Apple Cobbler with Hot Sugar Crust

As promised, more on the apple hit parade. Think of this Apple Cobbler with Hot Sugar Crust as my little weekend gift to you!

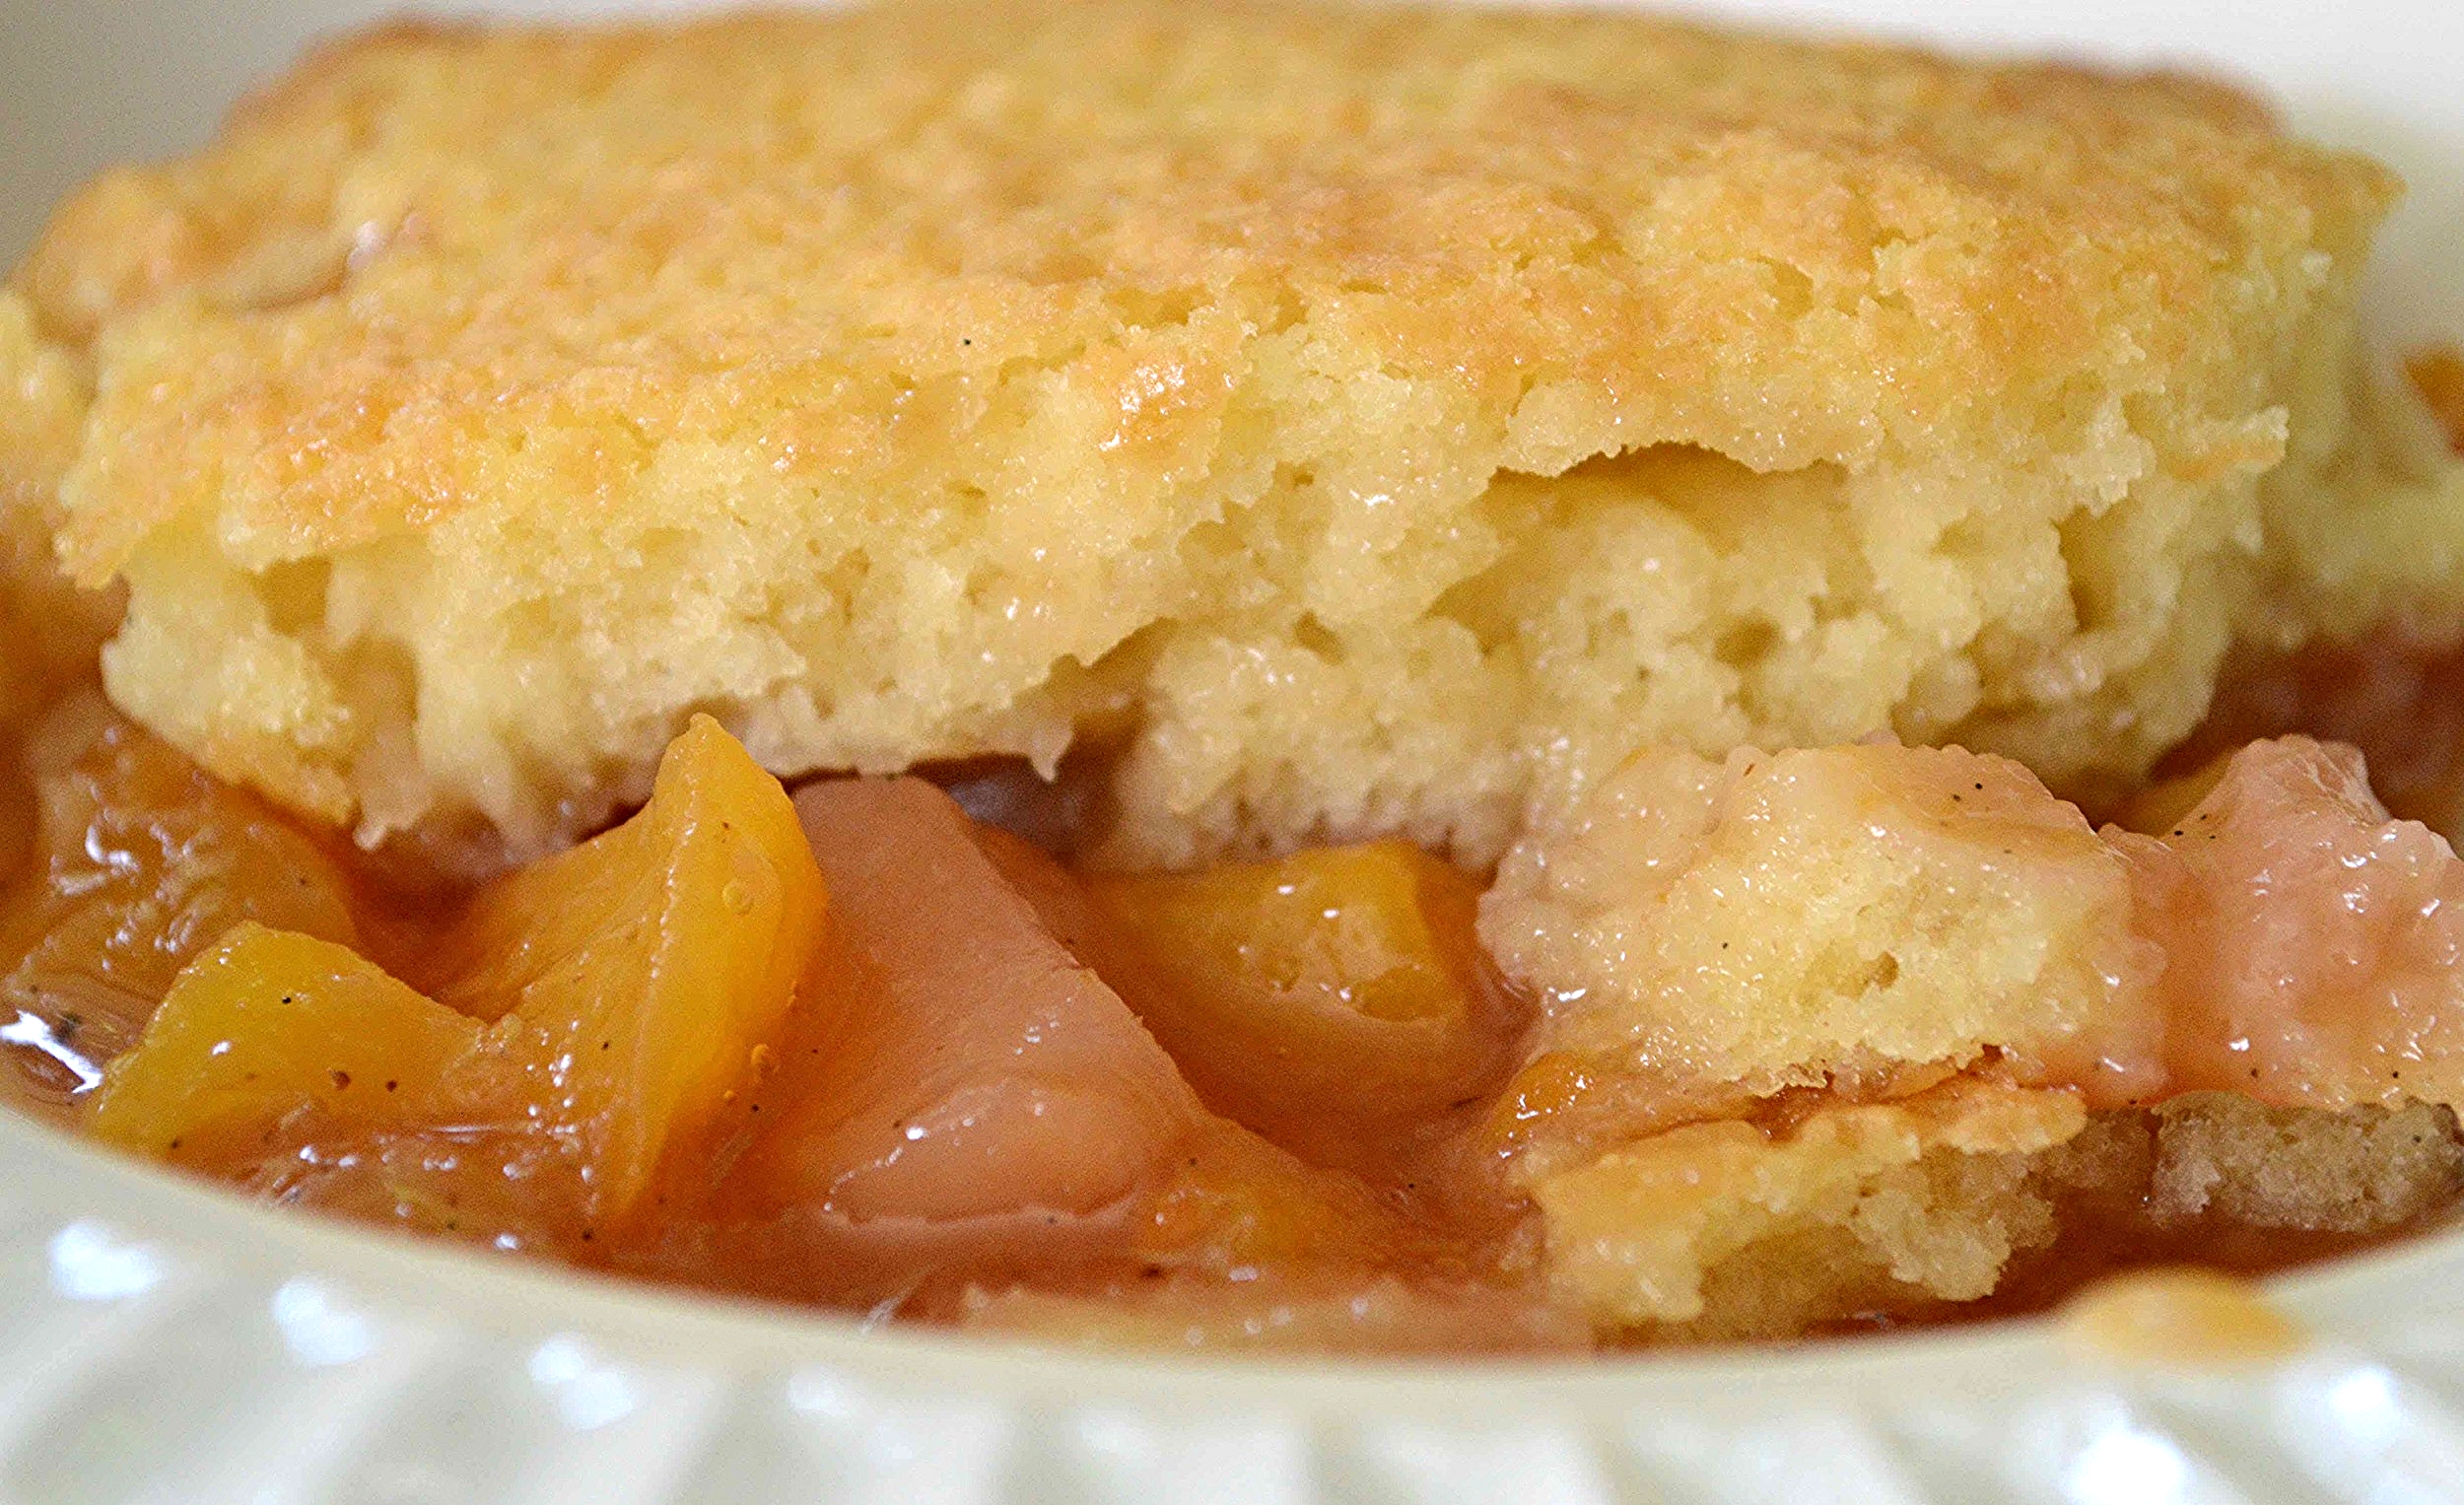
Seriously, how can you look at this glorious concoction and not want to instantly shovel it into your face?
Would that I invented it myself but no such luck—it’s plucked from the pages of Food 52’s Genius Desserts via Renee Erickson and it’s so simple but so brilliant too!

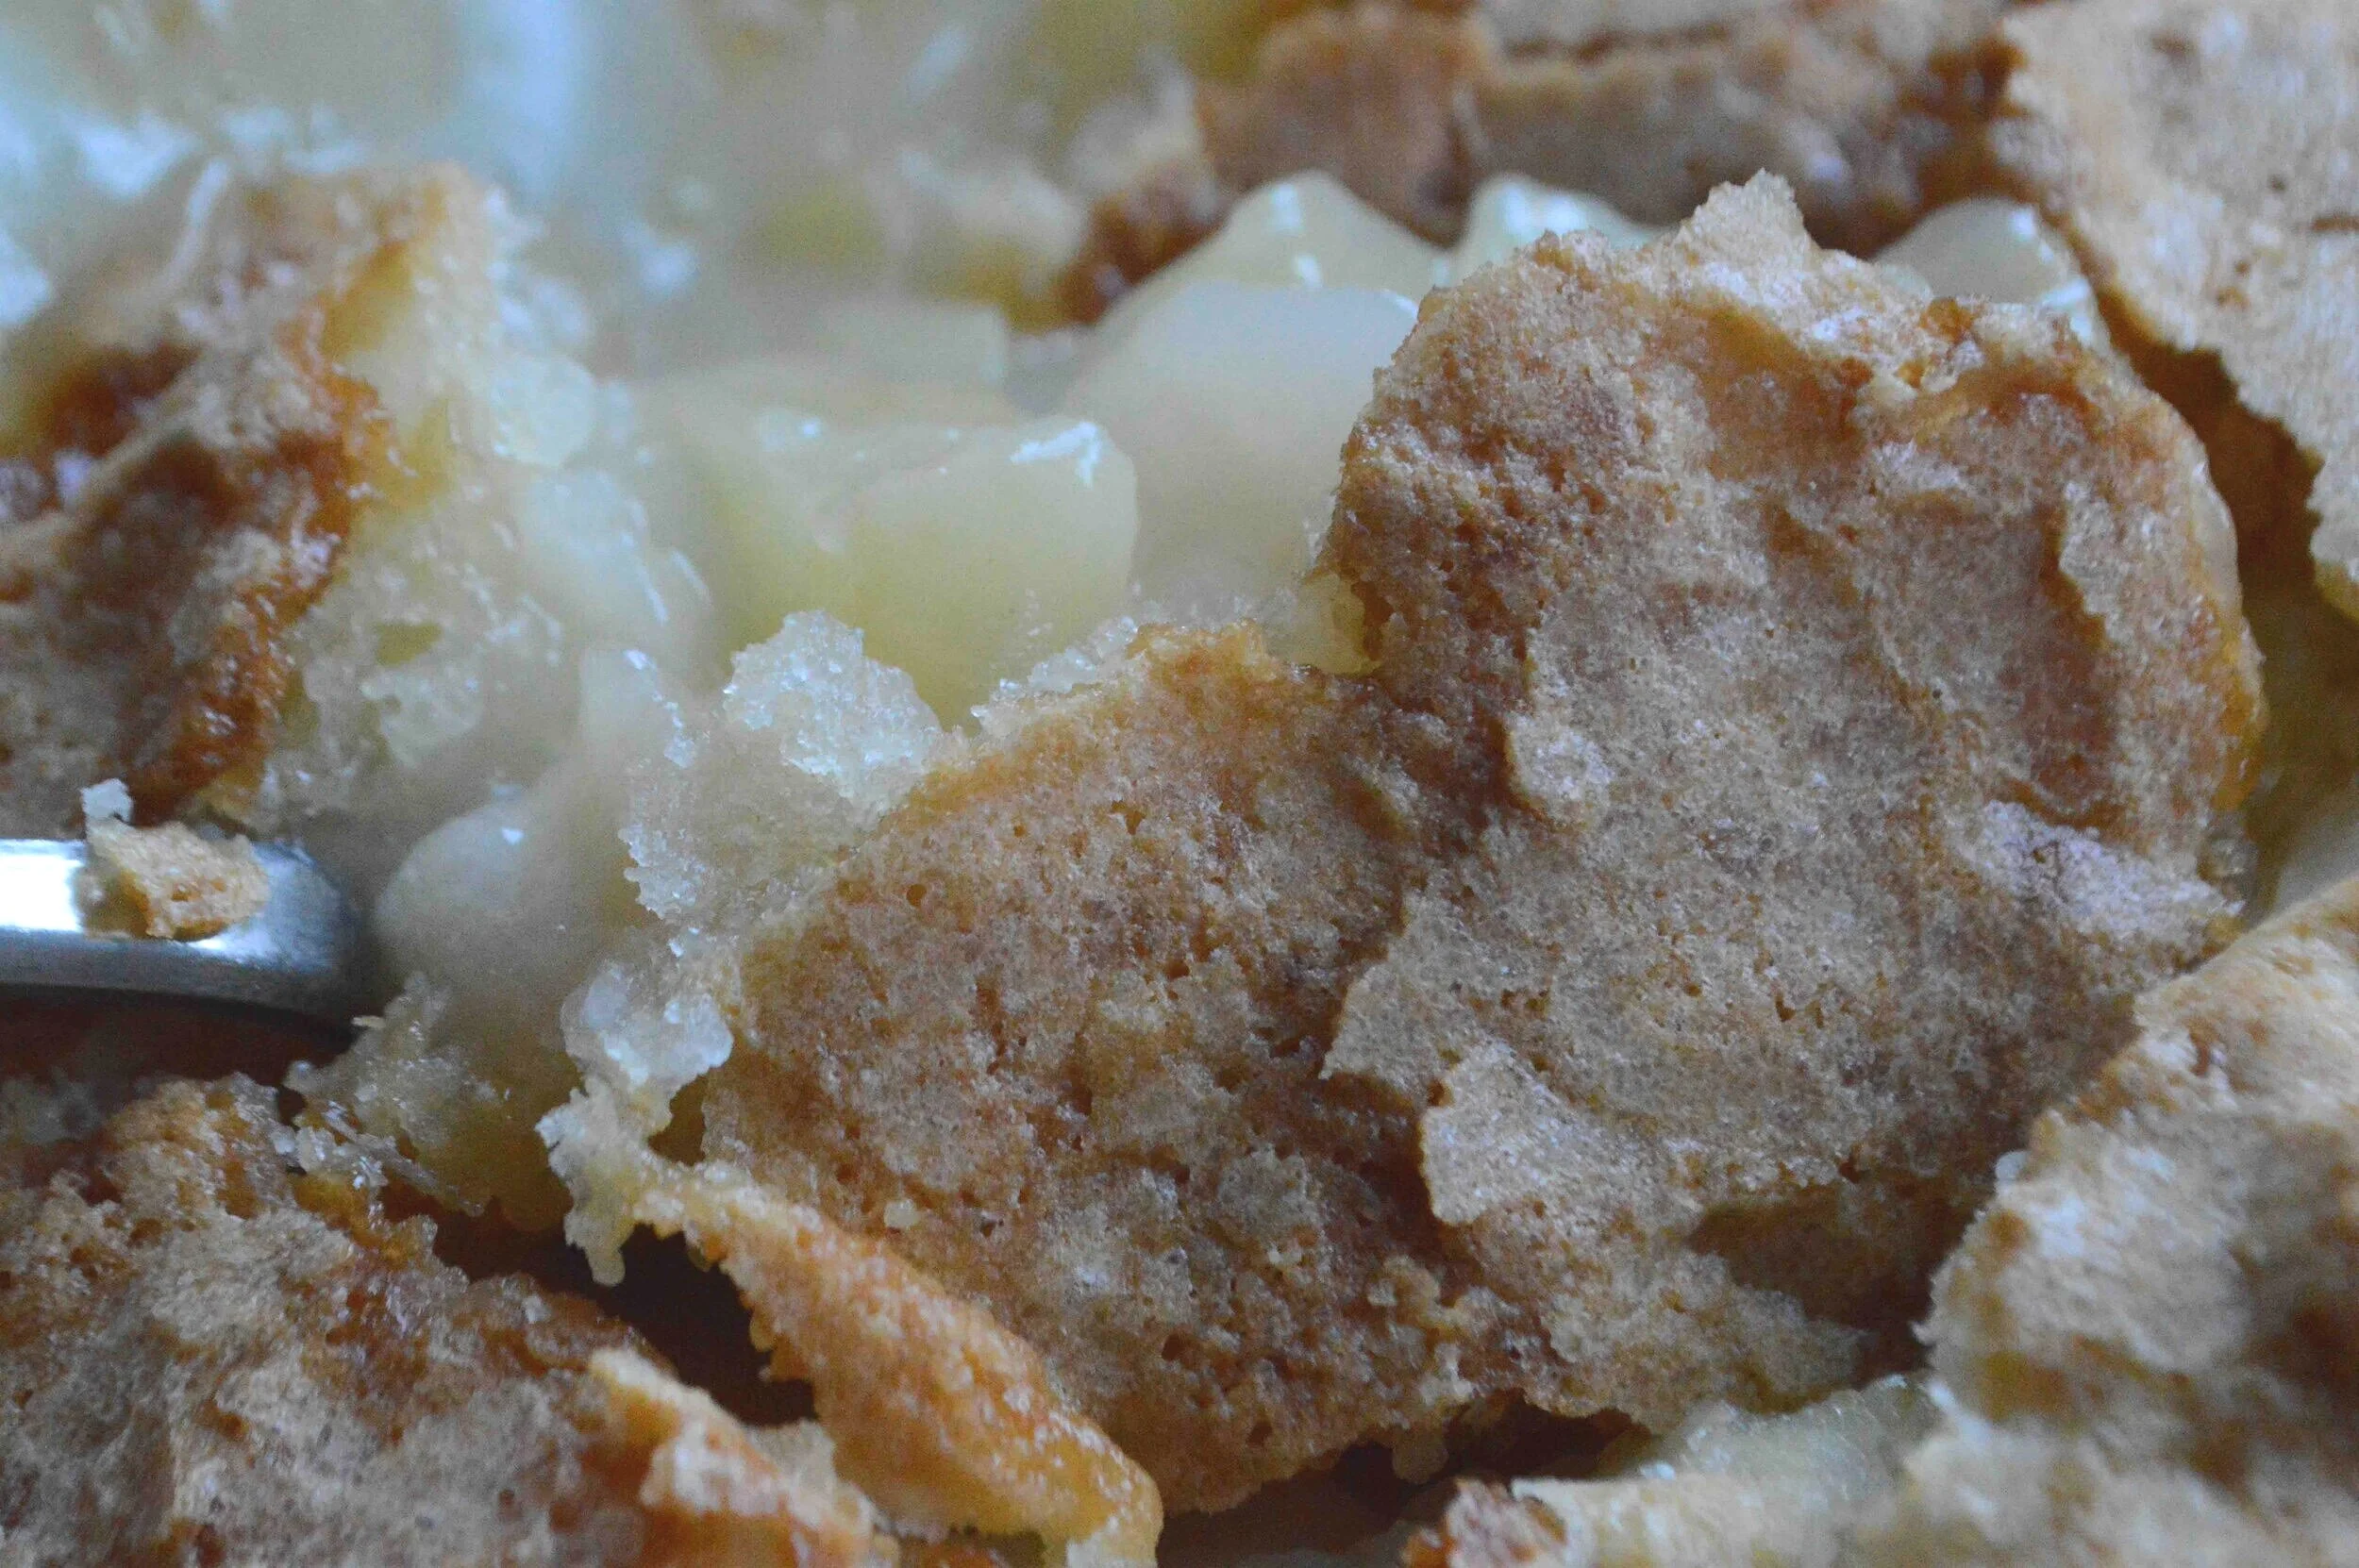
Instead of using a traditional cobbler topping, that is generally biscuit-like, made with cold butter incorporated into a flour/sugar mixture, this one is instead topped with a sweet, buttery batter over which you sprinkle sugar and then pour on hot water. What this does is liquify the sugar which then re-fuses as it bakes in that steamy environment, and creates that crackly, volcanic-looking crust that just begs to be shattered with a spoon!
You will find it hard not to pick off all the topping, but then there is that fluffy cobbler-like layer below and those meltingly delicious sweet apples beneath! All of them are just so, so good!
It’s amazing on its own or topped with a scoop of vanilla ice cream or whipped cream (sorry, my ice cream topped bowl somehow disappeared before I could snap a photo!! Hmmnn…. wonder why? but you can use your imagination!)

Once you try this I have a feeling you’ll be making it all apple season long! (Just as a little side note—I originally saw this recipe made with peaches and I suspect it would work well with plums too which are in season now in case you don’t want to go the apple route.)
Anyhoo, have an amazing weekend, for those of you celebrating Rosh Hashanah, have a very happy and sweet New Year and I’ll be back next week as we shockingly find ourselves in October! Yikes!

Apple Cobbler with Hot Sugar Crust
Makes at least 10 servings
Prep Time: 40 minutes; Bake Time: 70-80 minutes
Ingredients
About 10 large apples (12 cups total), peeled, cored and chopped (I used Granny Smith and Honeycrisp but you could use any firm cooking apples
1 large lemon
½ cup unsalted butter, (110g) room temperature
2 cups sugar (190g,) divided
1 ½ cups (190g) unbleached, all-purpose flour
2 teaspoons baking powder
1 teaspoon kosher salt
¾ cup (185g) whole milk
½ cup (120g) hot water
The Recipe
1. Make sure the rack is centered in the oven and preheat to 350ºF. Line a large rimmed baking sheet with aluminum foil and set aside.
2. Place the chopped apples in a 9x13-inch baking dish. Zest the lemon over the fruit using a Microplane. Cut the lemon in half and juice the lemon, straining it into cup and removing the seeds. Pour the juice over the apples. Wrap up the remaining lemon half and store in the fridge to use for something else.
3. Use an electric mixer to beat together the butter and 1 ½ cups of the sugar (about 300g) on medium speed, until sandy, about 1 minute. Use a rubber spatula to scrape down the sides and add the flour, baking powder and salt and beat on medium speed for another 30 seconds or so, until all of the flour is incorporated and the mixture is evenly crumbly. On low speed, add in the milk and then increase the speed to medium and beat for a couple of minutes, scraping the bowl as necessary, until the batter is light and fluffy.
4. Scoop the batter in 6 or 7 large blobs over the apples and use an offset spatula or the back of a large spoon to spread the batter evenly across the fruit.
5. Sprinkle the remaining ½ cup sugar evenly across the top. Then, drizzle the hot water evenly across the top. It will melt that sugary topping.
6. Place the baking dish on the prepared sheet and bake for 70-80 minutes until the top is golden brown and cracked. If you test the top with a toothpick or cake tester, it should come out mostly clean with barely a crumb sticking to it. Be sure to check it in a few places so that it is evenly cooked through.
7. Let the cobbler sit for about 30 minutes to firm up—this is not absolutely necessary but it will make the top more crackly and make serving it neater too and prevent those roof of the mouth burns! Serve warm with ice cream or whipped cream. Leftovers can be stored in an airtight container in the fridge for a few days and eaten cold or reheated.
Enjoy!
Note: Recipe adapted from Genius Desserts by Kristen Miglore via Renee Erickson. I subbed in apples instead of peaches. Also, this has a bright fresh flavor from the lemon zest and juice—if you want to go more the traditional pie route you could sub in cinnamon and vanilla for the zest and maybe cut down on the lemon juice—I might try it that way the next time.