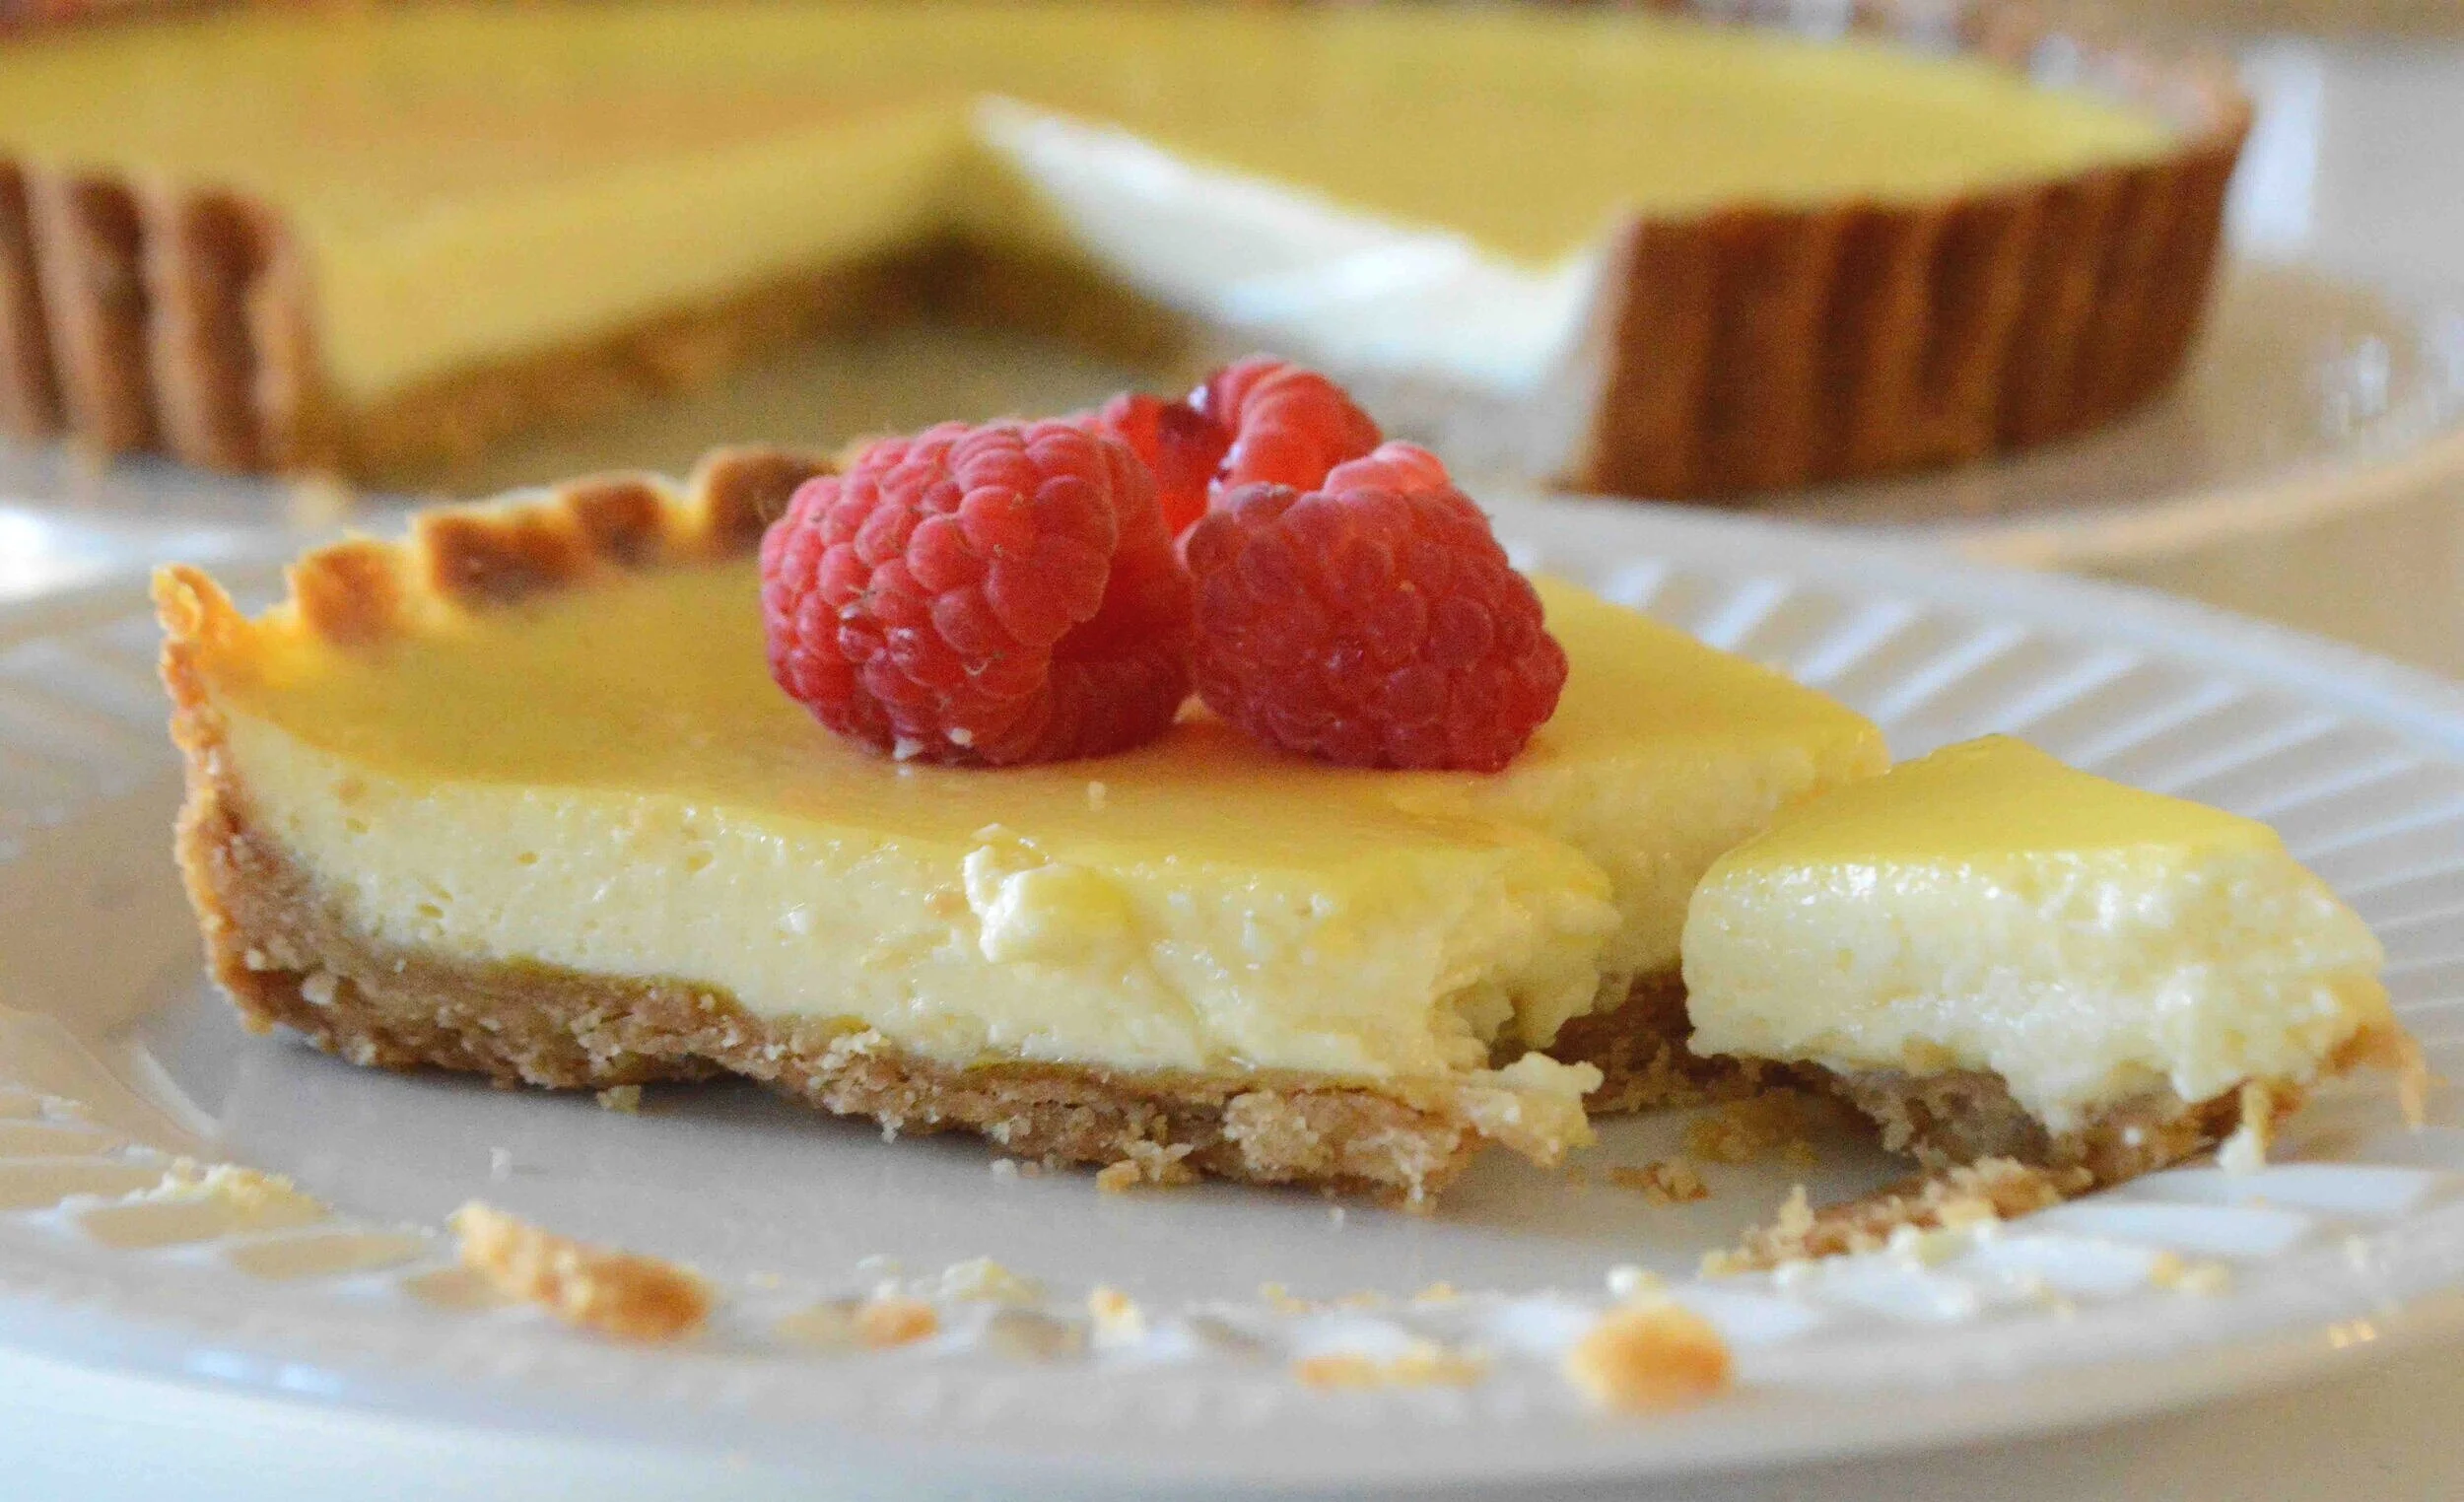
Brown Sugar Sour Cream Tart

Normally I wouldn’t share a brand new dessert just 2 days before Thanksgiving because I’d be fairly confident that everyone had their meals all planned and it would just kinda throw a wrench into everything and be a big fat tease. But times are not normal now. Thus the last-minuteness of this truly wonderful Brown Sugar Sour Cream Tart. Part cheesecake, part custard, it’s a whole lot of deliciousness. You forgive me now, don’t you?!!
Another reason I feel justified in throwing this at you at this late juncture is that all the ingredients are fridge and pantry staples, so there’s really no need for any emergency market runs, which are particularly challenging now…unless you happen to not have sour cream in the house and then an extra trip to the store is probably in your very near future! Again, sorry!

But perhaps one of the biggest reasons I’m feeling you might not entirely hate me for this late post, is that this luscious tart comes together quickly and easily without the need for a mixer or any other special gadgets.
You start by whipping up a buttery, brown sugar crust that simply gets pressed into a tart pan (no rolling out or crimping necessary) and then partially baking it.

The filling, which is nothing more than eggs, sugar, salt, vanilla and sour cream gets whisked together by hand, poured into the pre-baked crust and then baked to allow it to firm up to an almost fluffy cheesecake-like consistency.

It’s creamy and dreamy and that slight tang from the sour cream really balances out the caramelly brown sugar crunch of the crust!

Toss a few berries on top for decoration and you’re good to go! No matter how you’re planning on celebrating this year, I guarantee this simple tart will please!!

Have a happy, healthy and safe holiday!!xoxo
Brown Sugar Sour Cream Tart
Makes one 9-inch tart
You will need a 9-inch fluted tart pan with a removable bottom for this.
Prep Time for Crust: 10 minutes; Bake Time: 20-25 minutes; Prep Time for Filling: 10 minutes; Bake Time for Tart: 20-25 minutes
Ingredients
For the crust
8 tablespoons unsalted butter, melted
¼ cup dark brown sugar, packed
¼ teaspoon salt
¾ teaspoon vanilla extract
1 cup plus 2 tablespoons unbleached, all-purpose flour
For the filling
3 large eggs
¼ cup sugar
⅛ teaspoon salt
½ teaspoon vanilla extract
1 ¼ cups sour cream (don’t use low-fat)
1 large egg yolk beaten with a pinch of salt
Fresh berries for serving (optional)
The Recipe
1. Place an oven rack in lower third of oven and preheat to 350ºF.
2. To make the crust: Mix together the butter, sugar, salt and vanilla in a medium bowl, stirring until the butter is almost absorbed. Add the flour and mix just until no traces can be seen. Let dough sit for a minute or two to firm up and then use your fingers to press it evenly up the sides and across the bottom of the pan. It might seem like there is not enough dough, but be patient and continue to work methodically and it will smooth out. Place the pan on a rimmed baking sheet and place in the oven for 15 minutes. Turn the pan around and use the back of a fork to press down any spots that have puffed up during baking. Bake for another 10 minutes or so, until the crust is golden brown all over.
3. To make the filling: While the crust is baking, whisk the eggs with the sugar, salt and vanilla in a medium bowl, then whisk in the sour cream and set aside.
4. When the crust is done, remove it from the oven and turn the temperature down to 300ºF. Use a pastry brush to brush the bottom of the crust with the beaten egg yolk to help seal the crust and prevent it from getting soggy. Bake the crust for about 1 minute more, then remove and pour in the filling. Return the tart to the oven and let it bake for at least another 20 minutes, until the edges are set but the center wobbles a bit when you gently nudge the pan. If it seems very loose, let it bake another 5 minutes and check again. You don’t want it to be set like the edges but you don’t want it to be runny either. When the tart has reached the desired consistency, remove and transfer to a wire rack to finish cooling completely.
5. You can either serve the tart now or chill up to one day before serving (we liked this better cold). Cut into wedges and serve as is or garnish with fresh berries.
Enjoy!
Note: Recipe adapted from Sinfully Easy Delicious Desserts by Alice Medrich. I stayed pretty true to this but cooked the filling longer.