Brown Sugar Pear Cake


So excited to share this wonderful cake with you today! I don’t have many pear desserts on the site and this simple, homey, and anything but ordinary Brown Sugar Pear Cake goes a long way to remedying this very distressing situation. When I took my first bite, I did a little celebratory dance around the kitchen. Guys, this is so seasonal and so delicious!

I always feel like pears are the ignored fruit of Fall. You know what I mean? We go apple and pumpkin picking and there are tons of recipes all over the web for pies and crisps and breads featuring those two but somehow pears get lost in the shuffle, which is a crying shame because when they’re good, they’re so good. I’ll still never forget a pear I had from a box of them that were sent to my in-laws from some fruit-of-the-month club years ago! So luscious and juicy!!
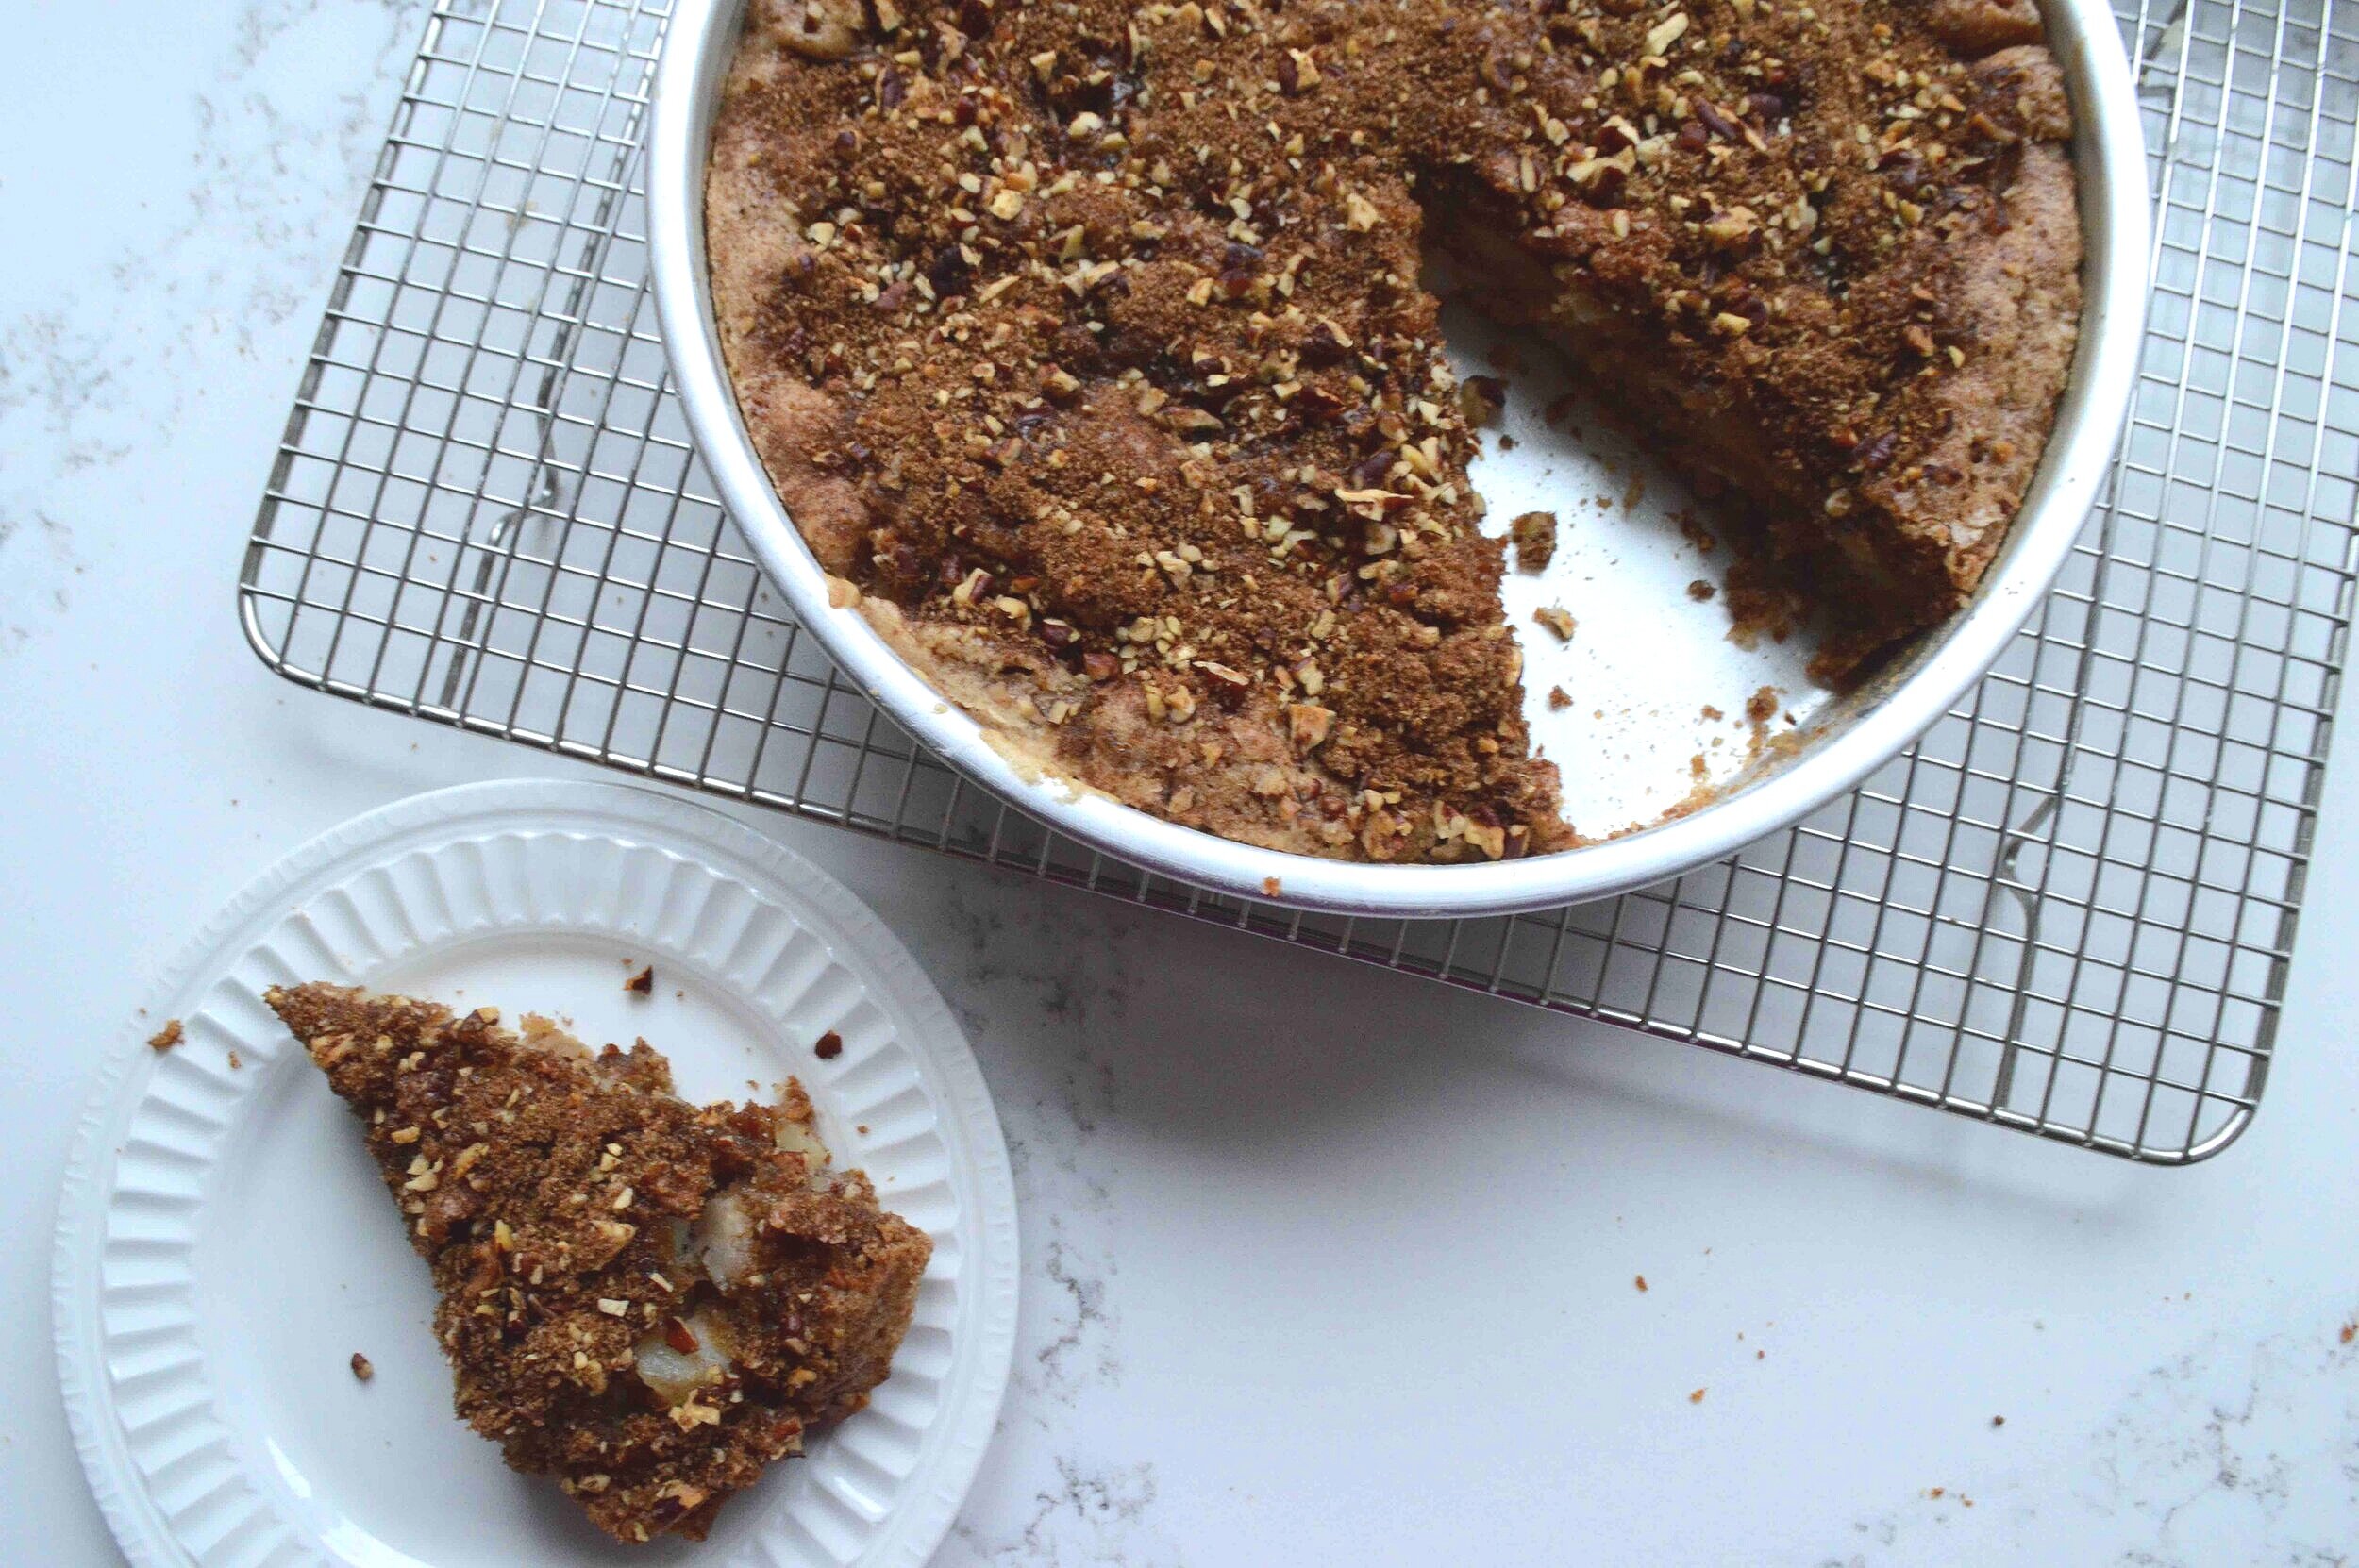
In this cake they’re combined with brown sugar to form the most addictive caramel-y topping underneath which lies a tender, buttery, brown sugar cake. You will love it! And though it might look a little intimidating to make, it’s really not—you don’t even need a mixer and it’s totally doable even on a weeknight.
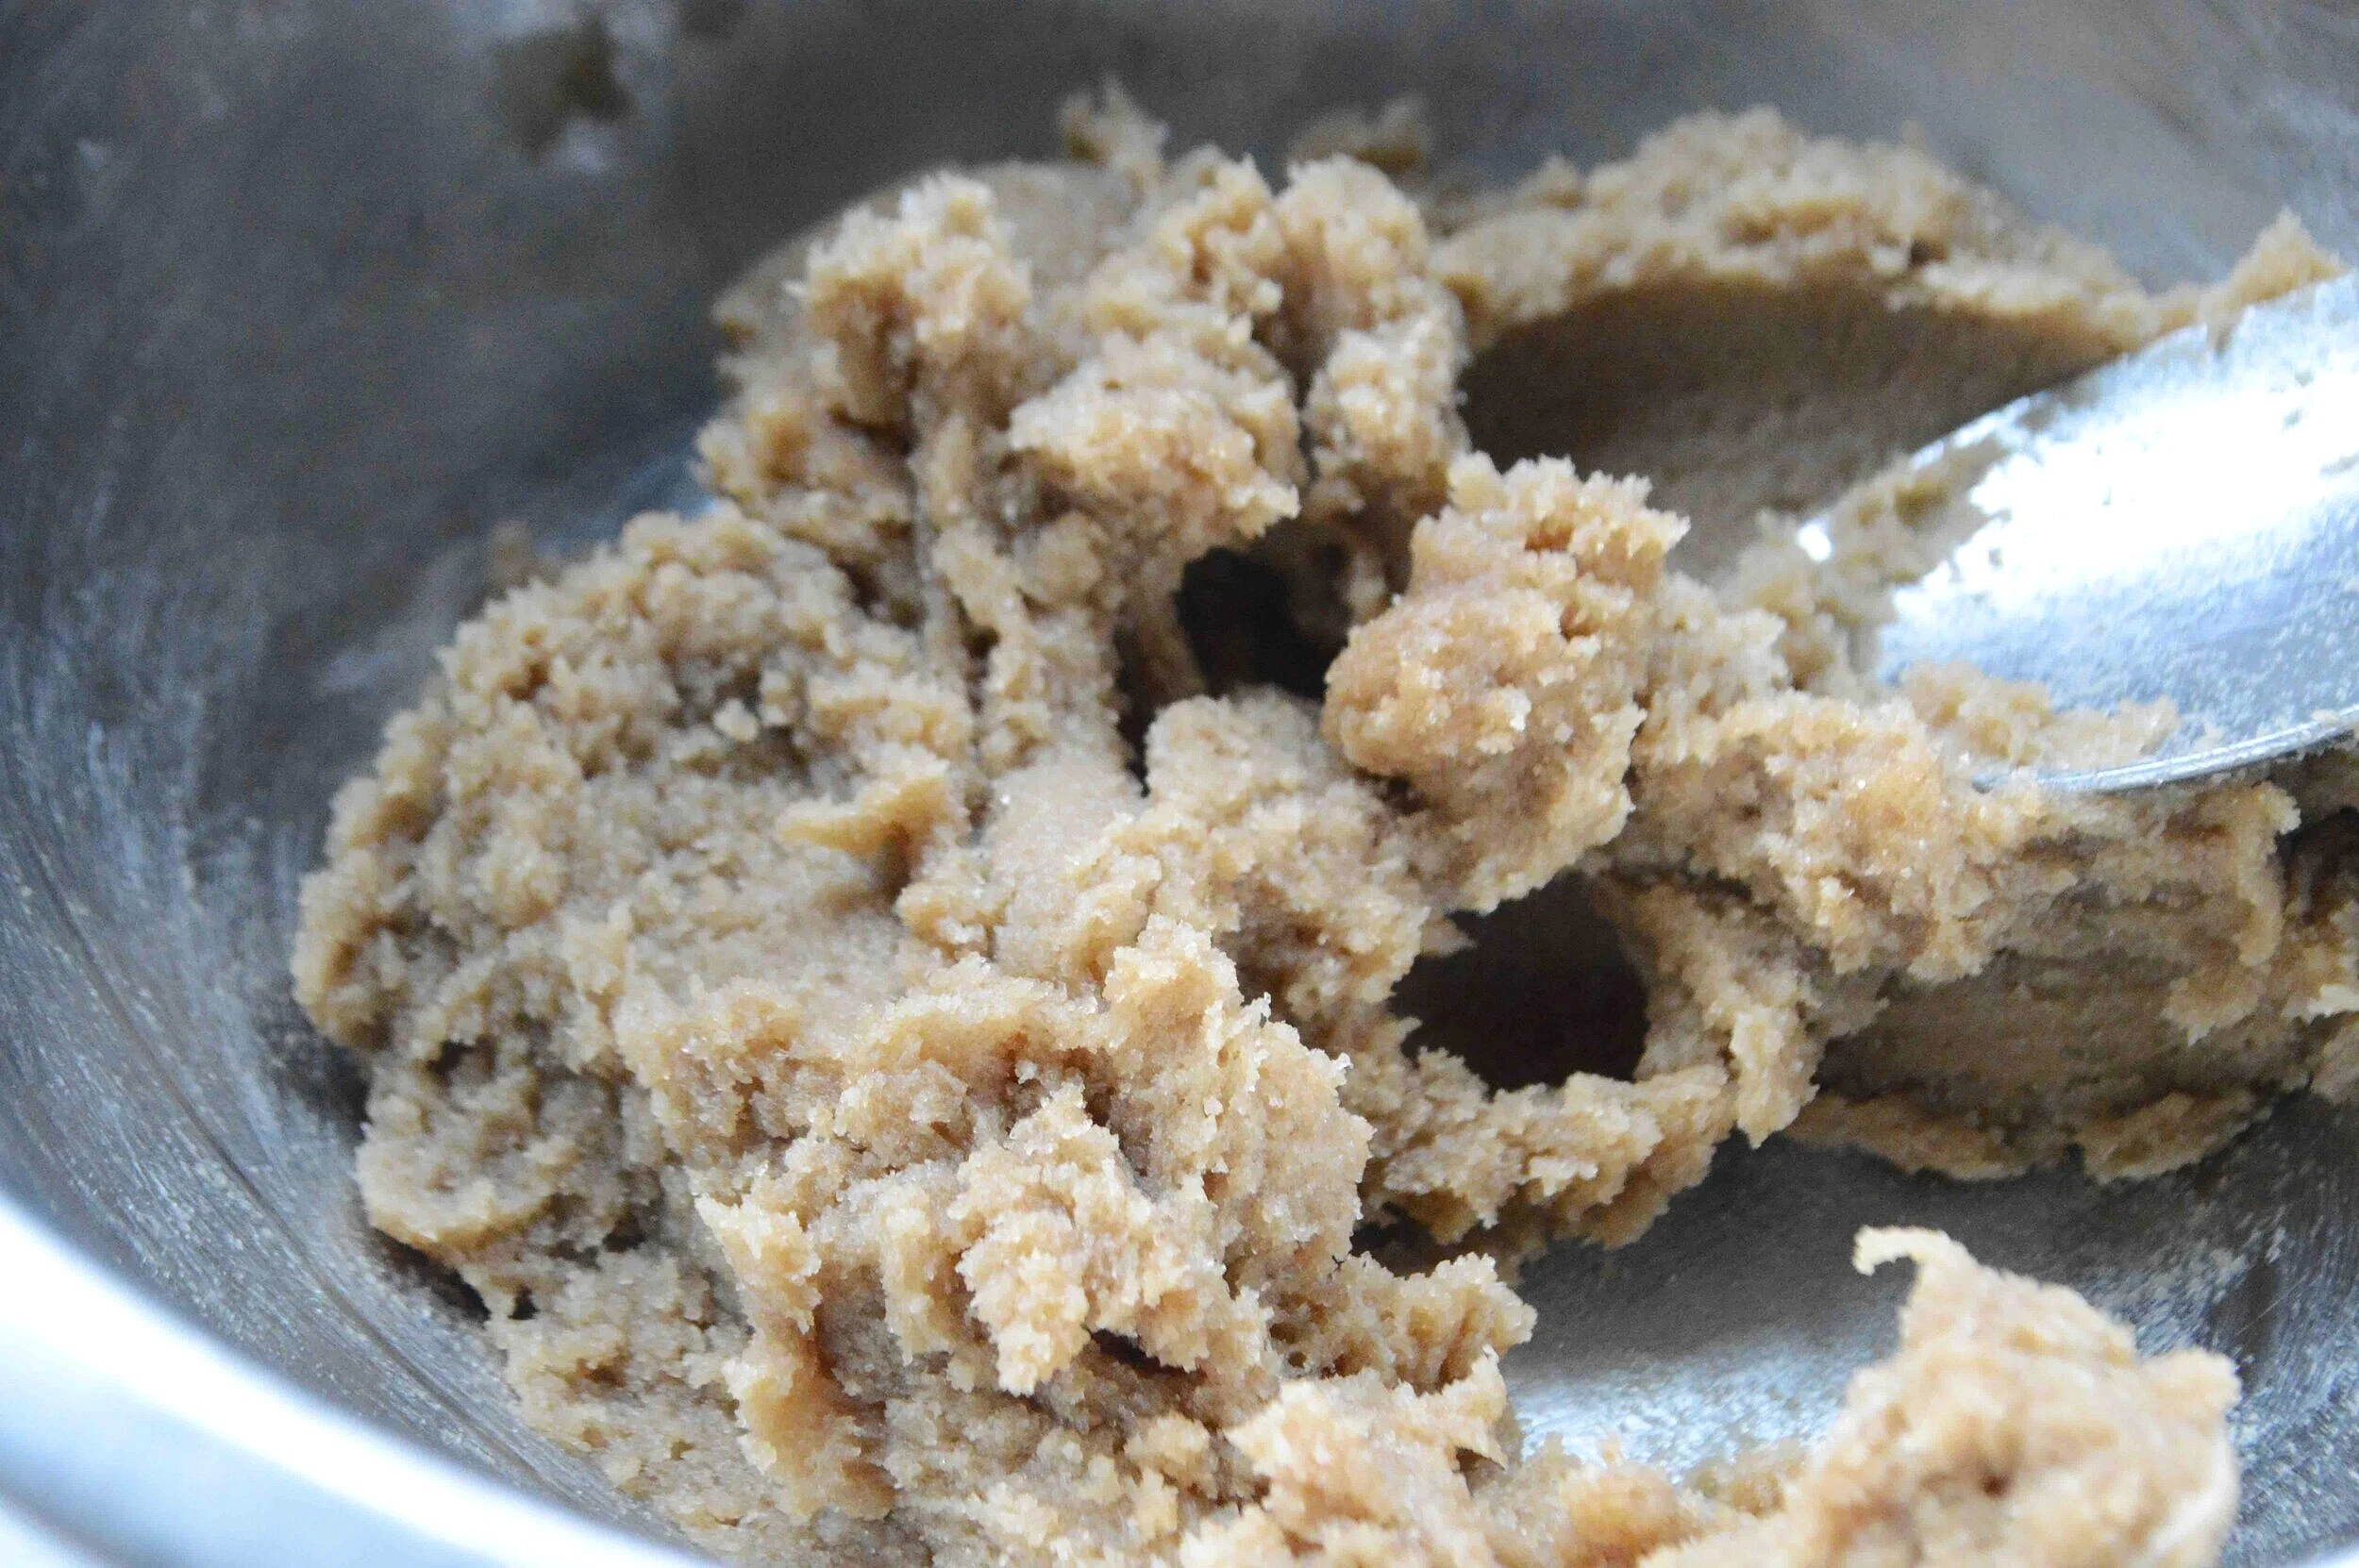
You start by mashing together brown sugar, butter and salt
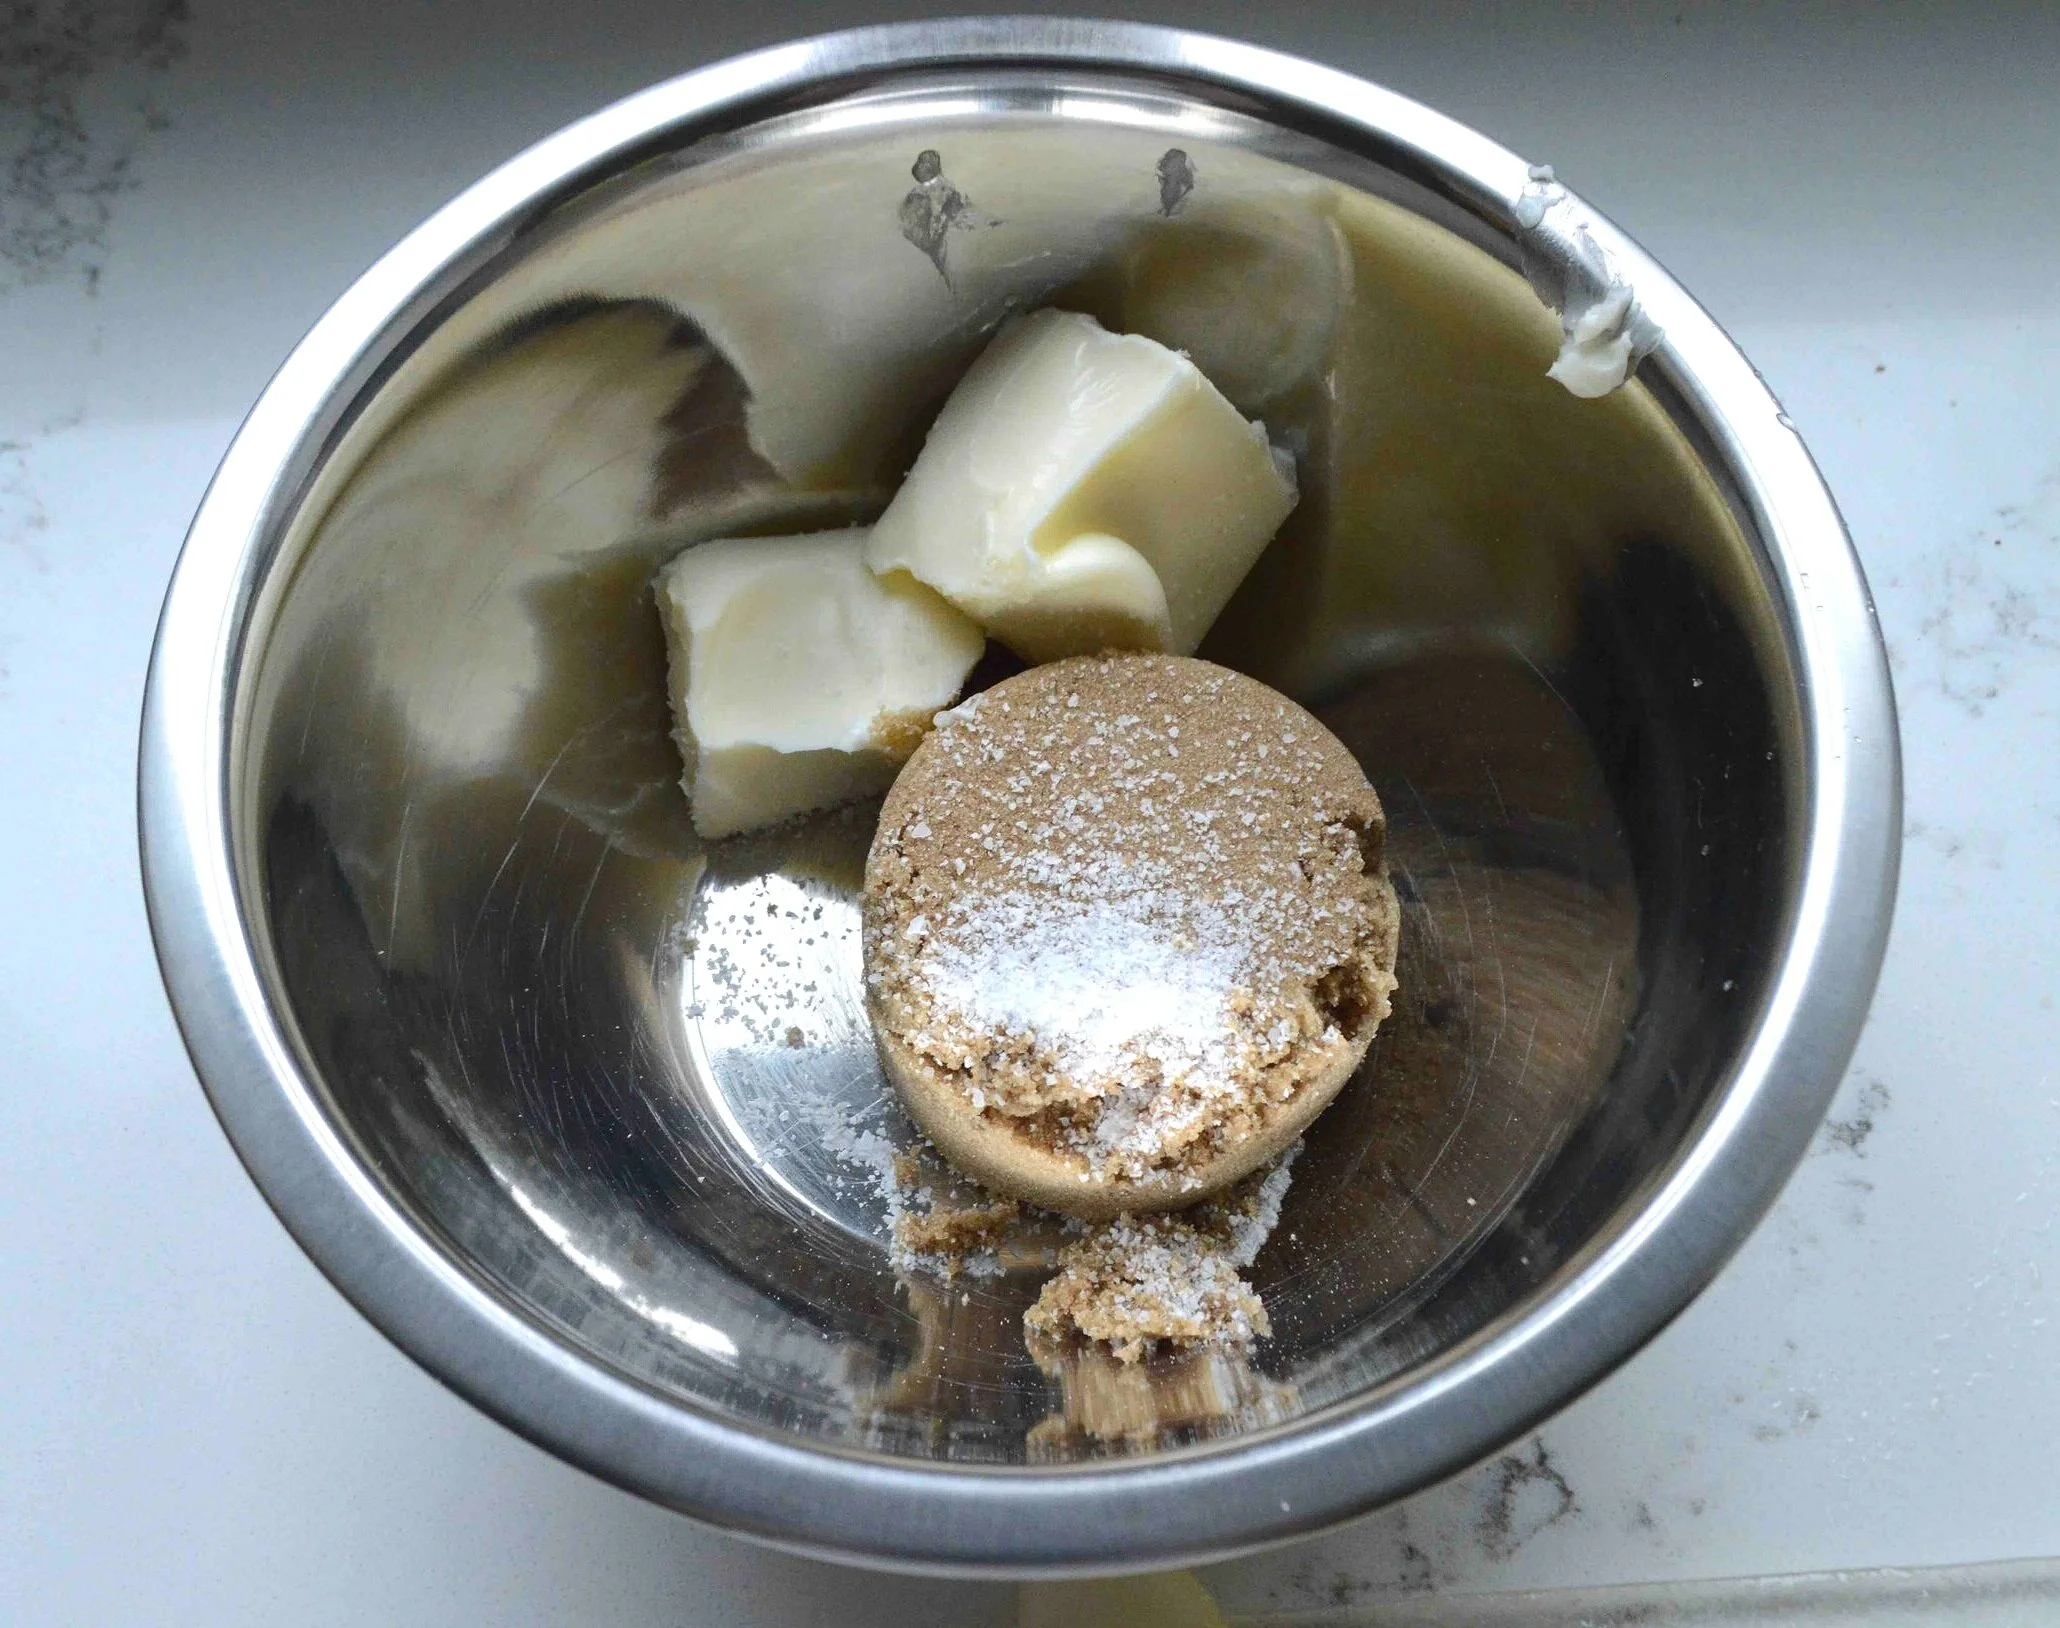
And making a little paste of it
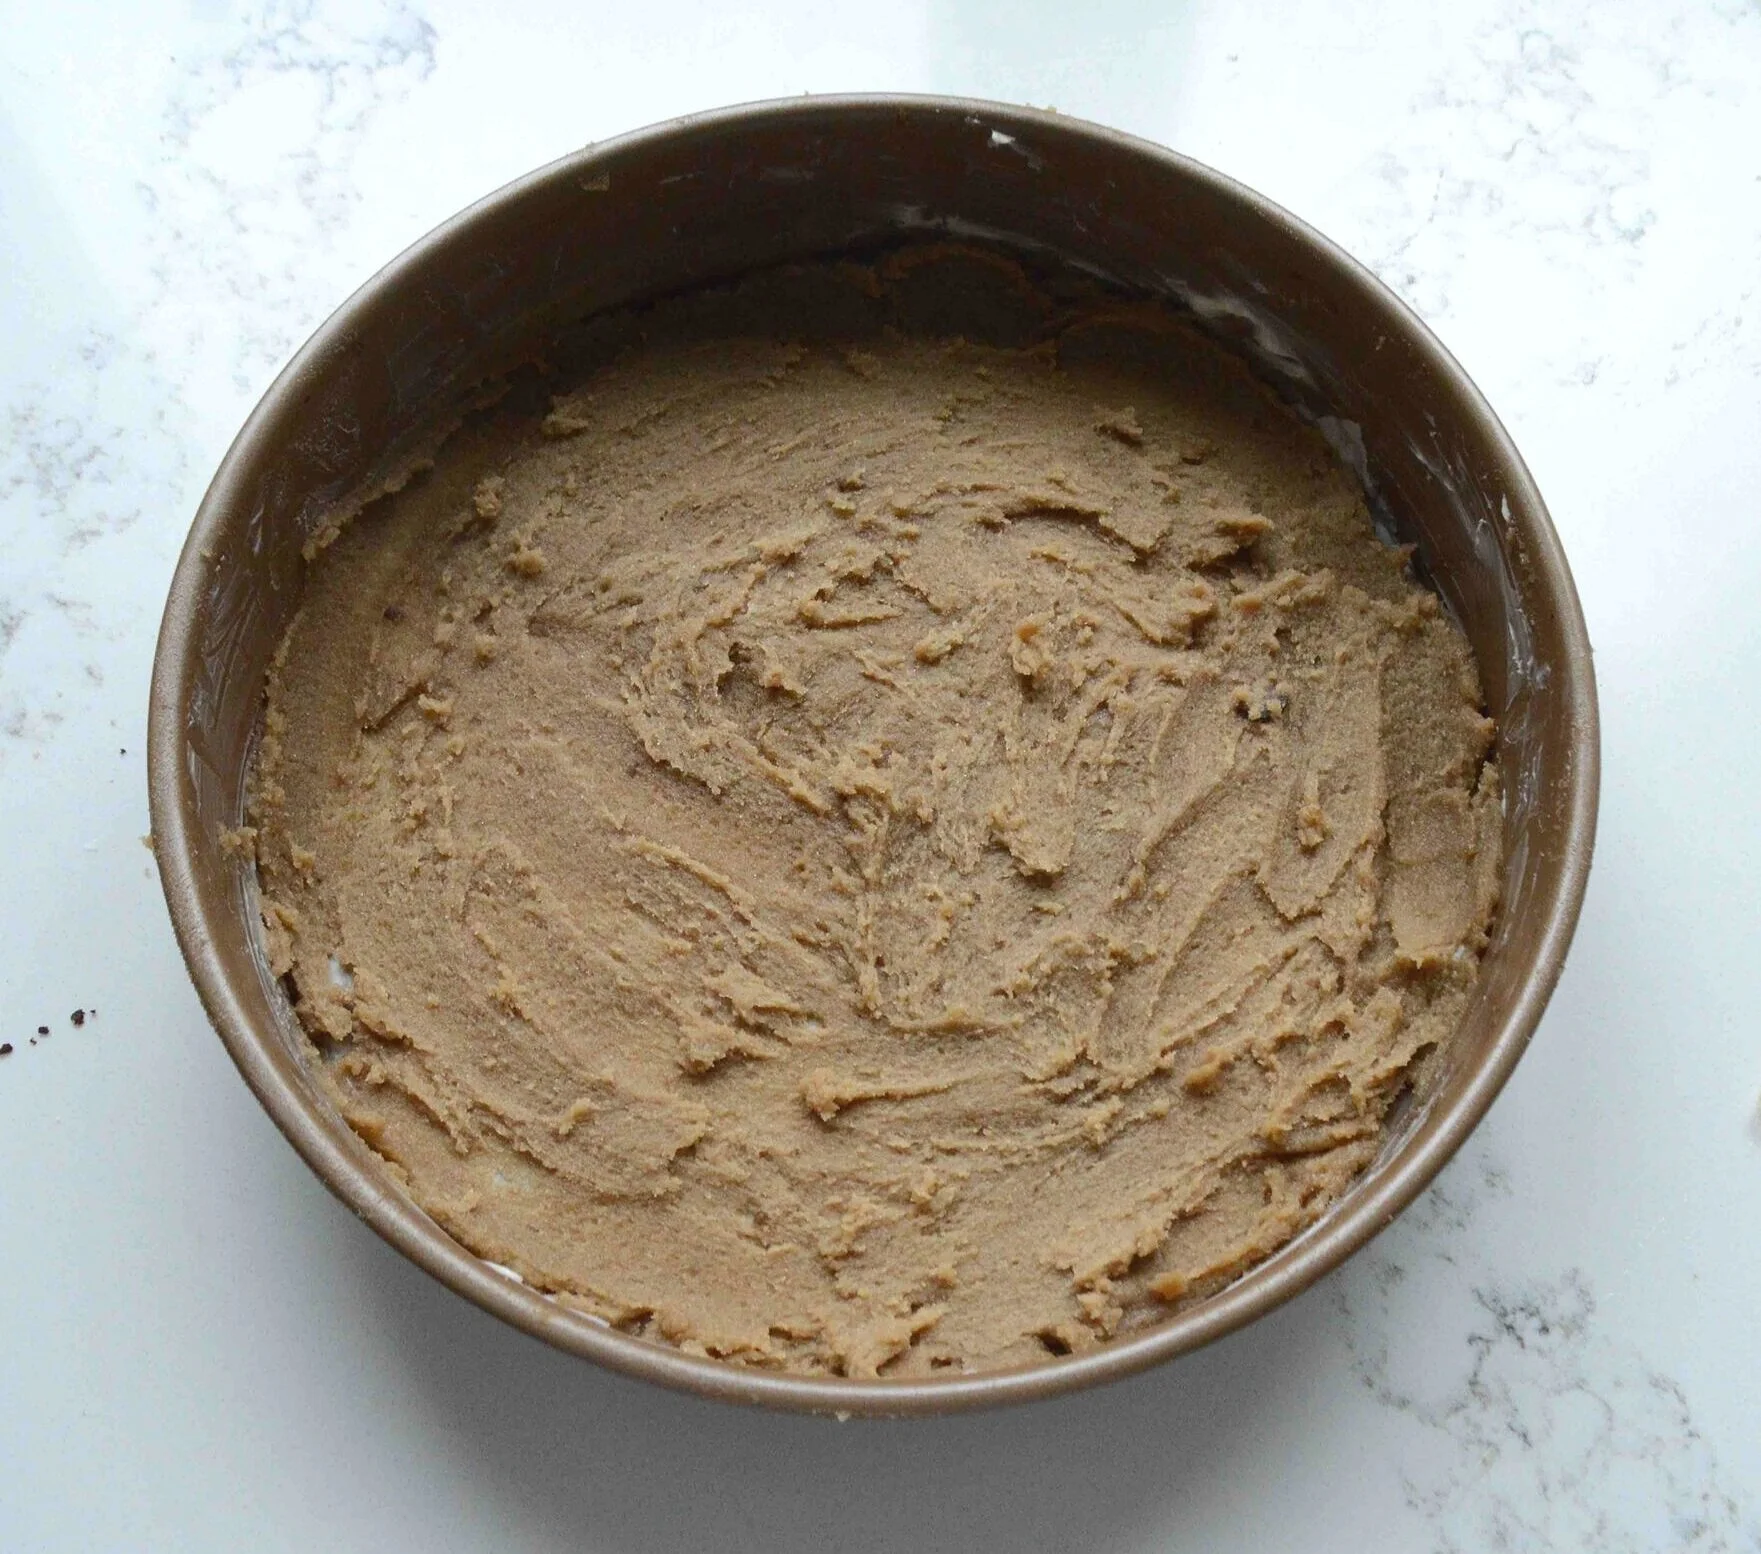
Which you then spread out into the pan
And top with sliced pear wedges

Then you simply whisk together the cake batter, pour it on top and bake.

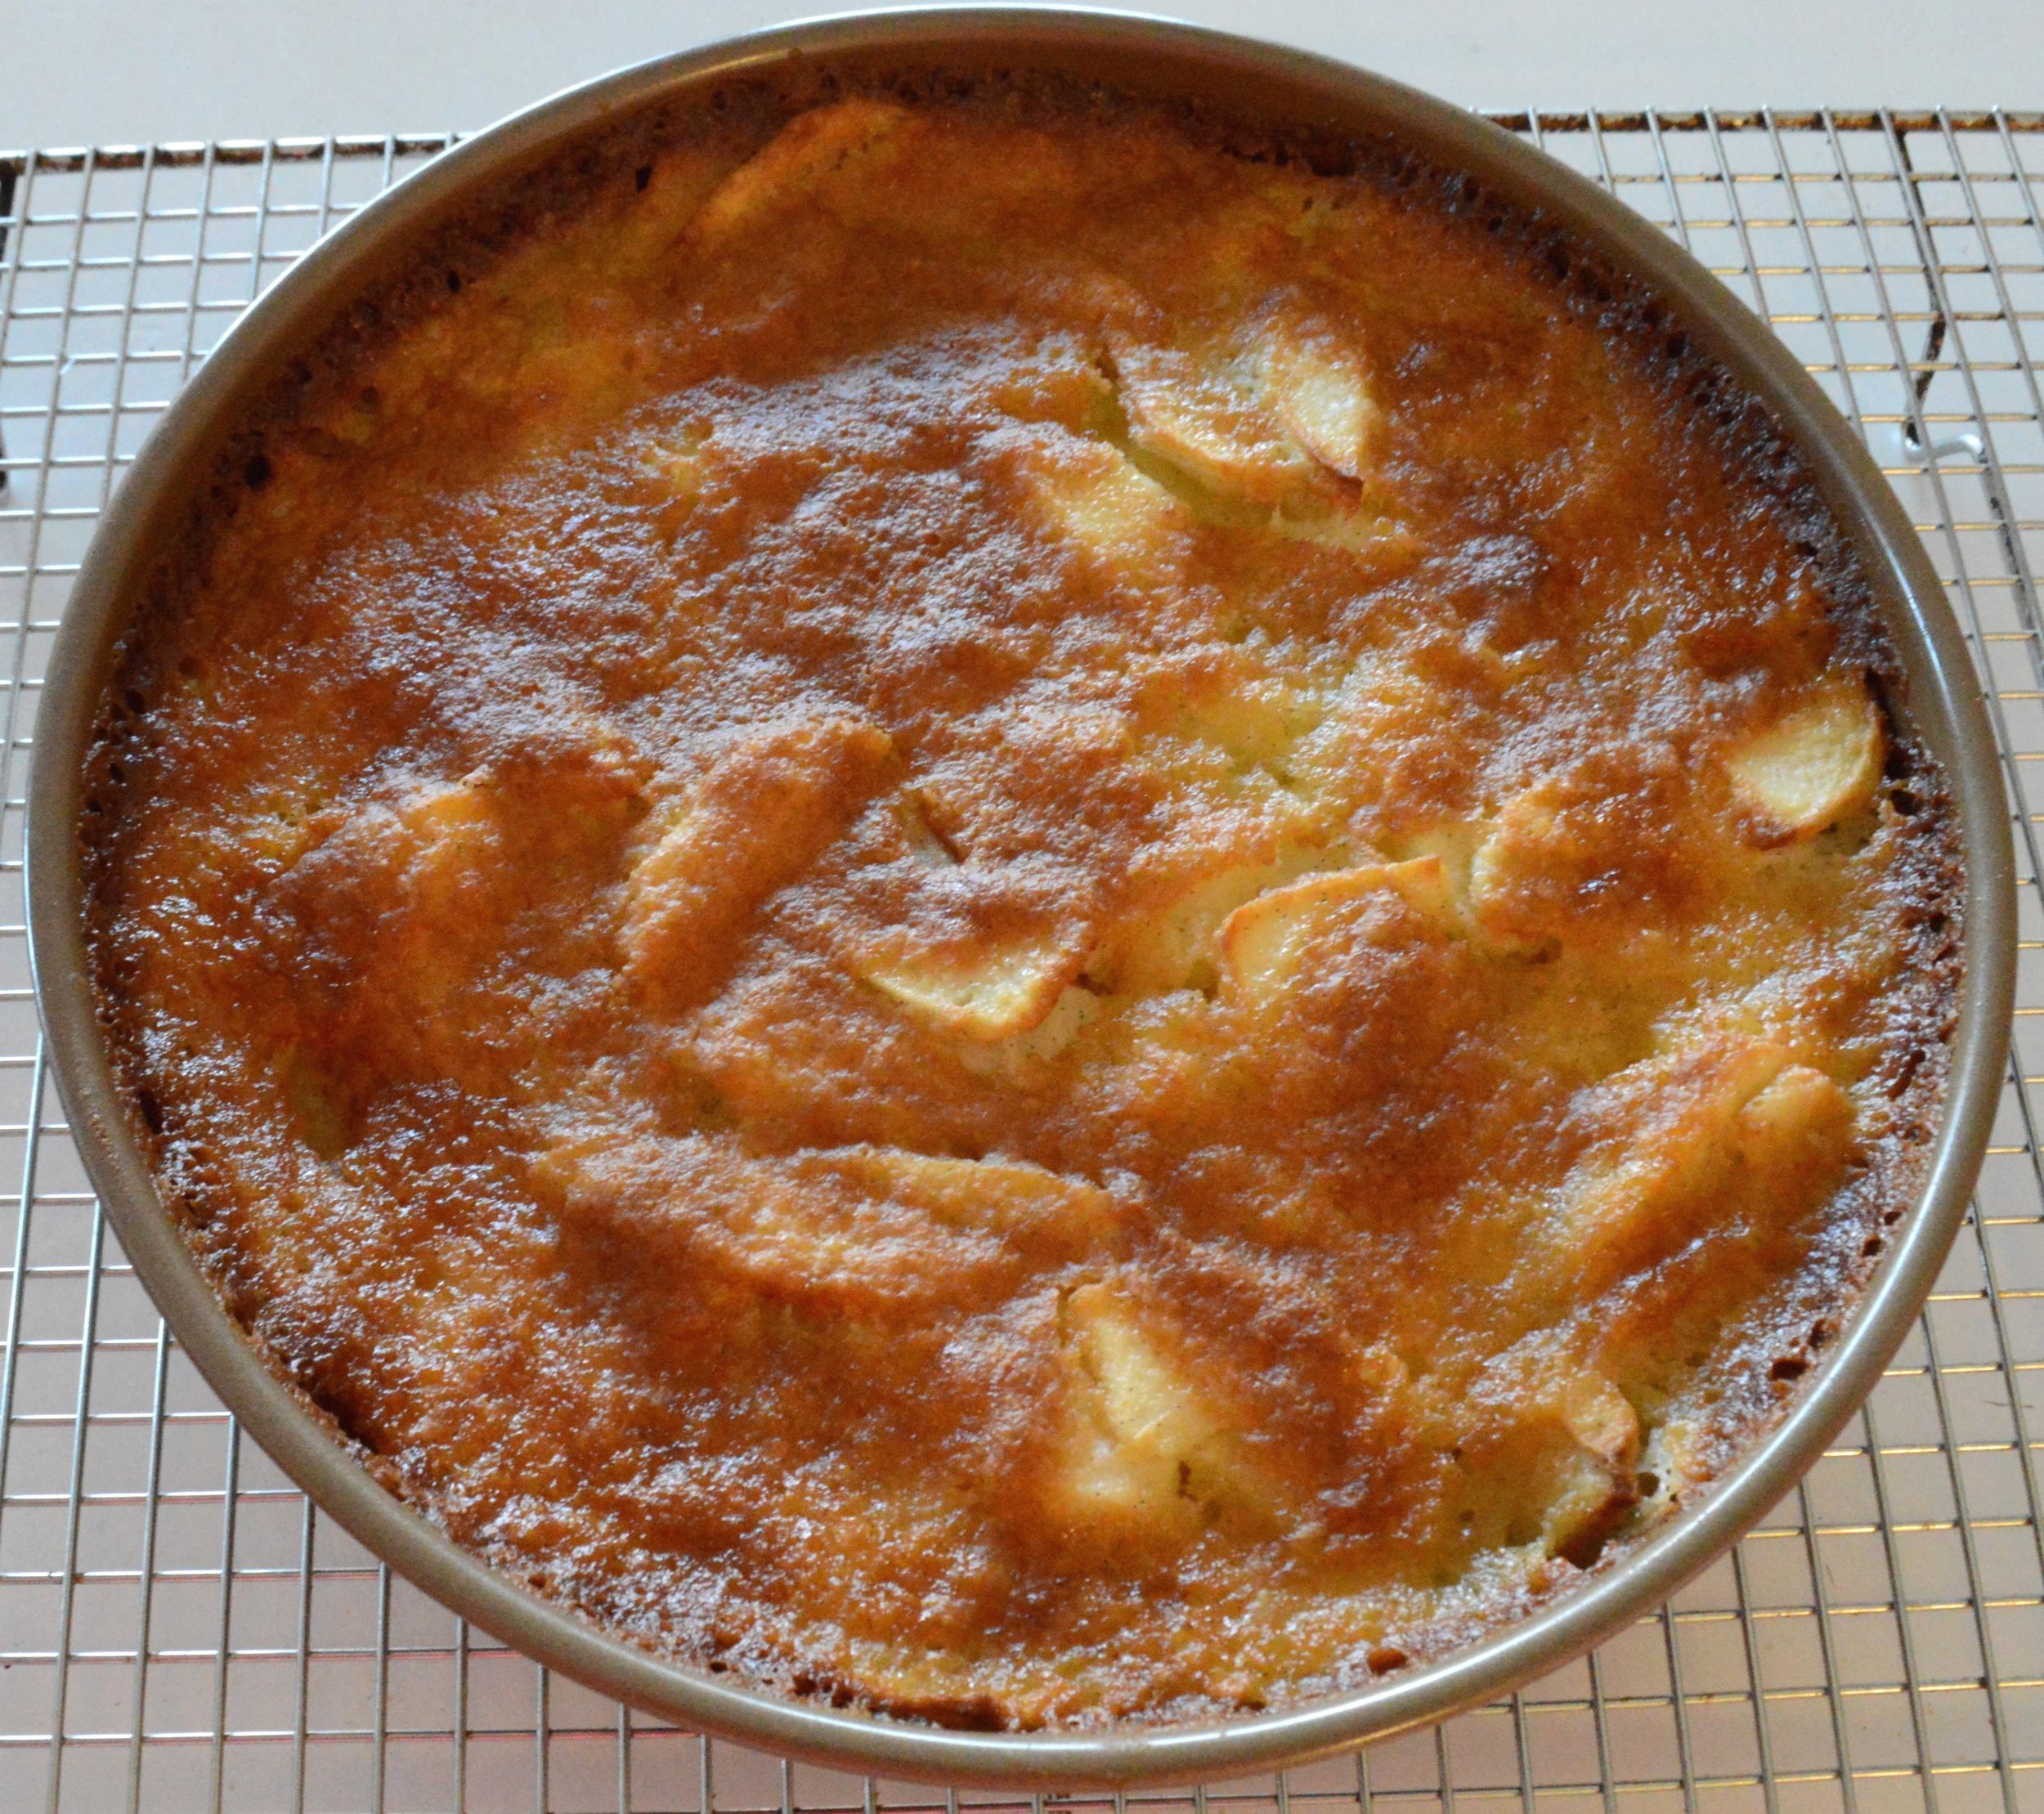
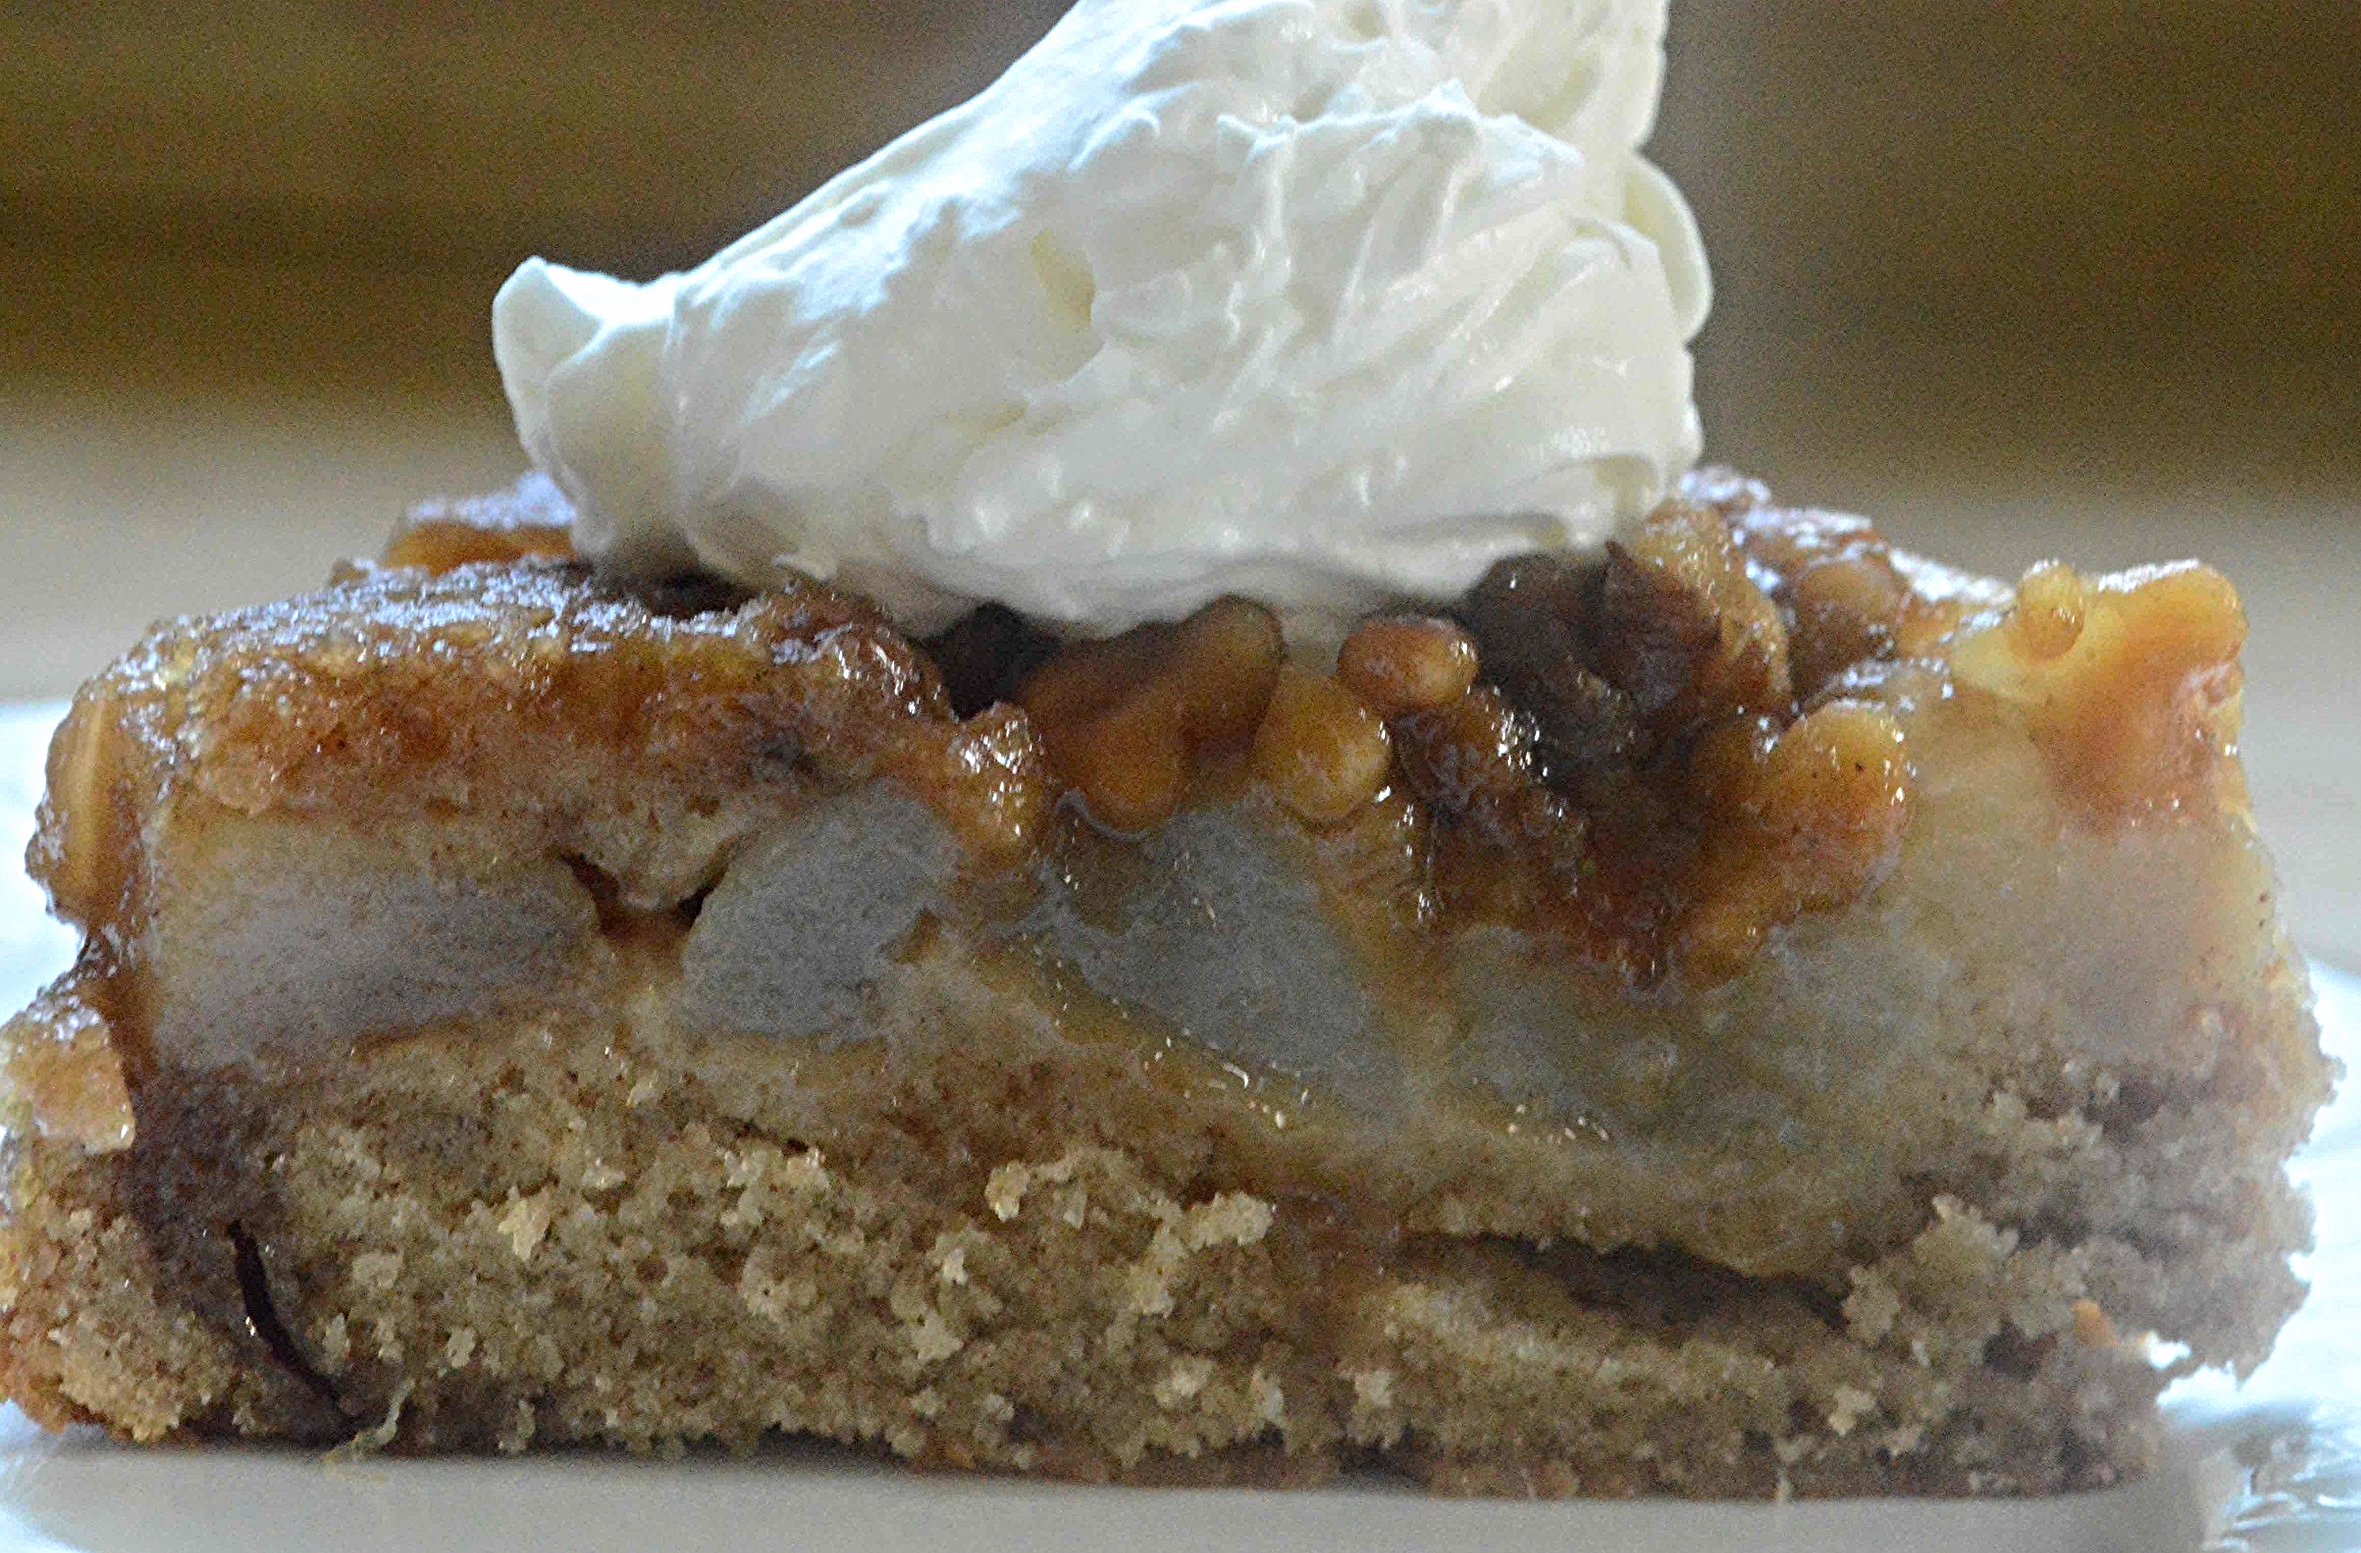
Eventually, after the cake has cooled, you invert it so that the bottom becomes the top and you get that decorative concentric pear thing going on.
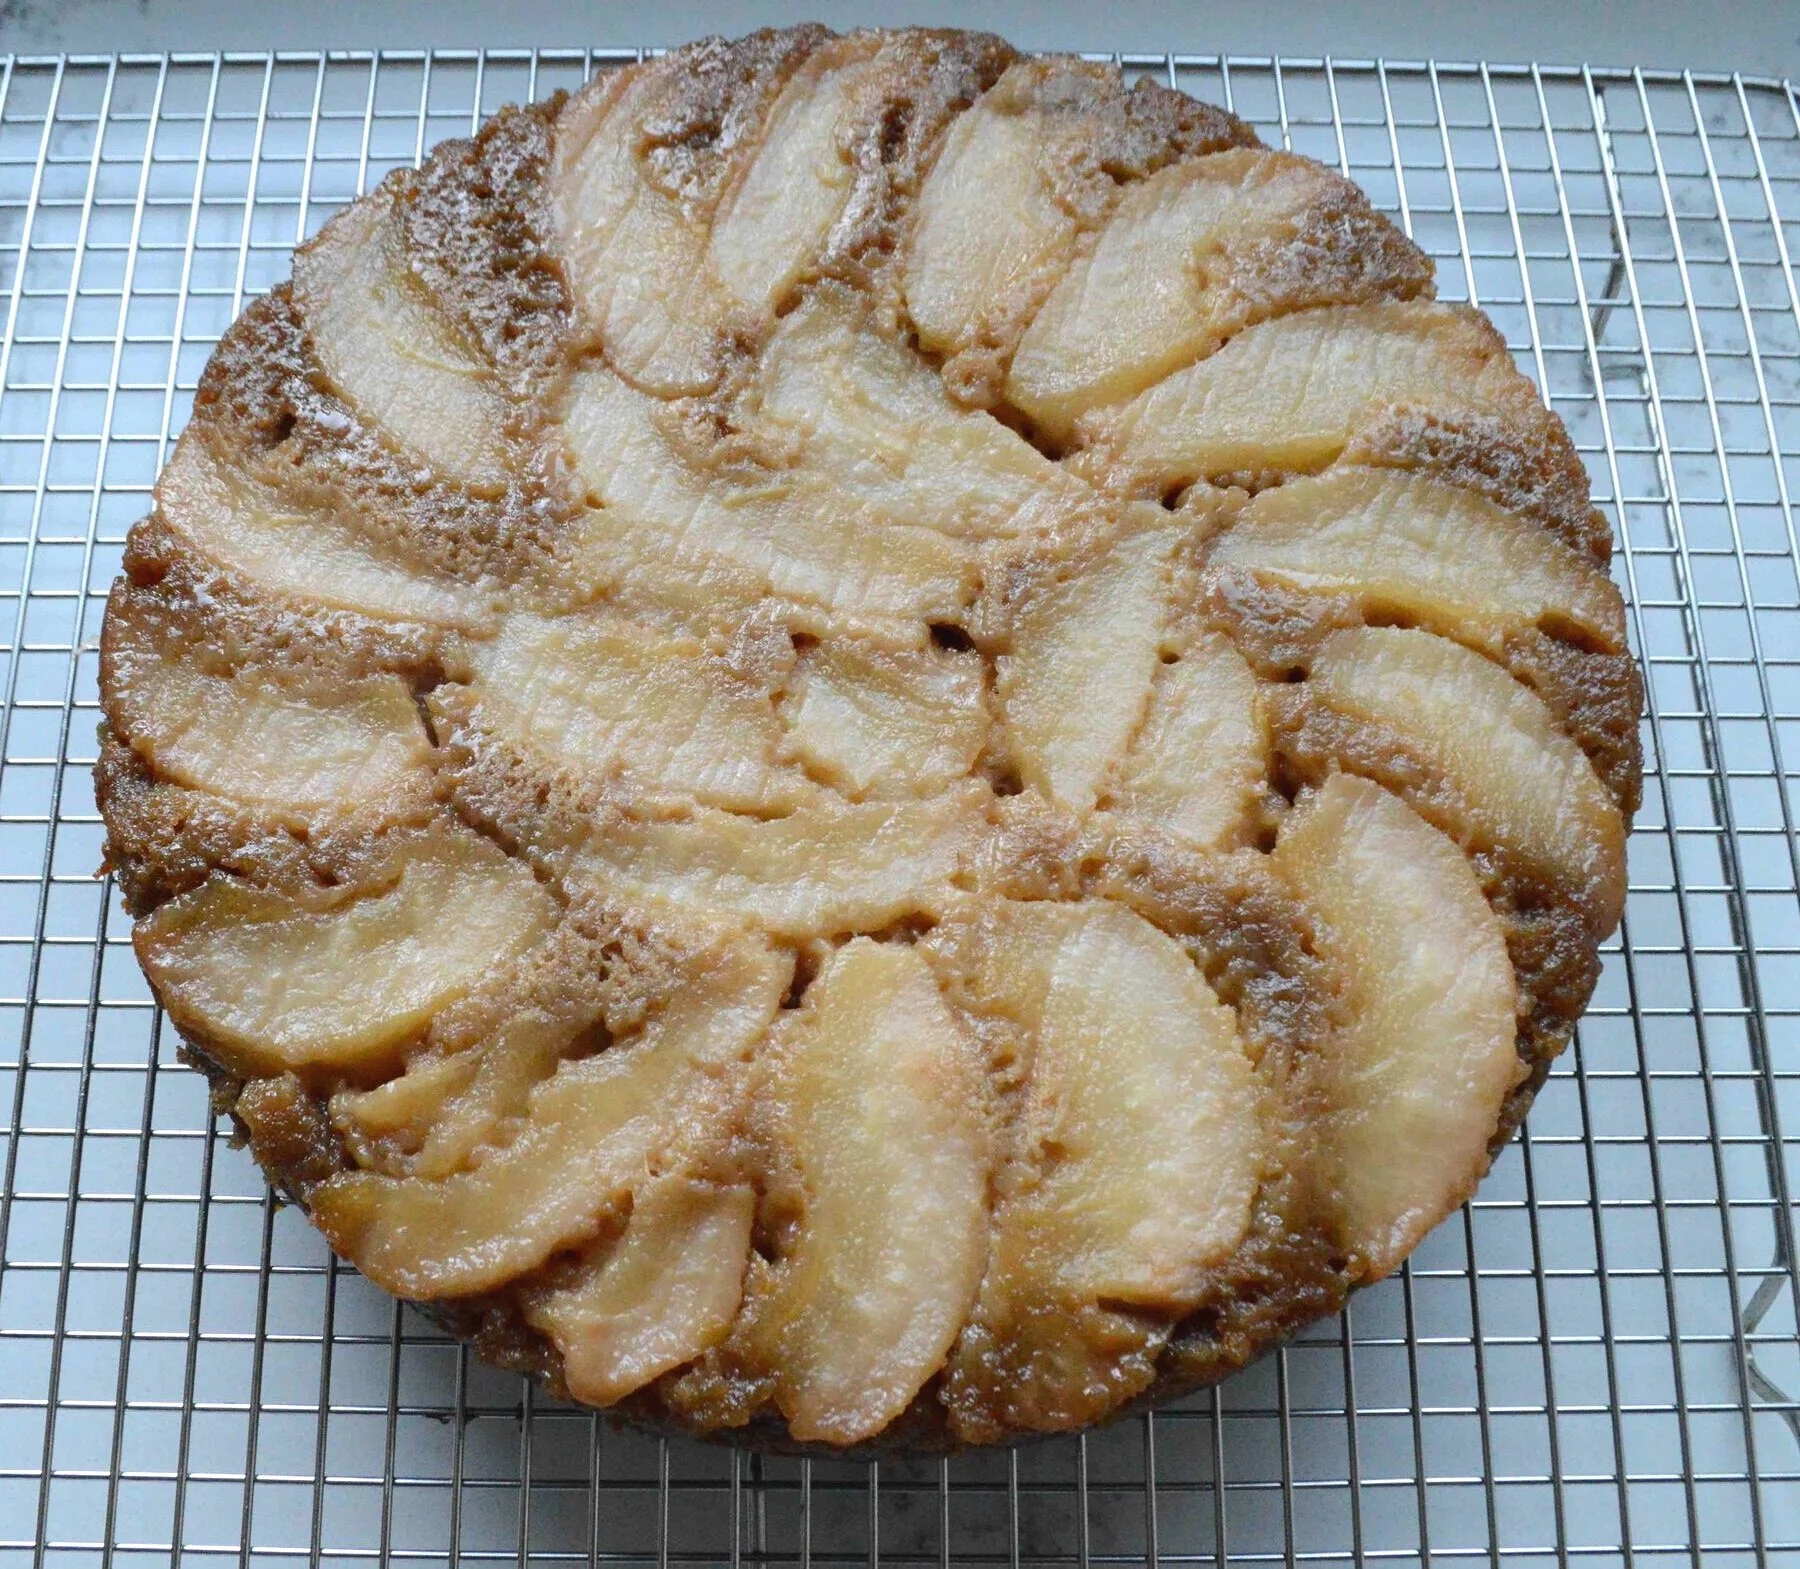
The cake is light and airy and the combo of the pears and brown sugar and butter all work so well together.
You could dress this up with whipped cream but honestly, it really doesn’t need anything.
After that first bite, I predict you’ll be dancing around the kitchen too!

Brown Sugar Pear Cake
Makes 8-10 servings
Prep Time: 30 minutes; Bake Time: 45-55 minutes
Ingredients
For the Pear base
3 ½ tablespoons unsalted butter, room temperature, plus additional for greasing the pan
½ cup dark brown sugar, packed
Pinch of kosher salt
2 ripe but not mushy pears (I used Bartlett), peeled, cored and cut into thin wedges, about ½-inch thick
For the Cake
2 large eggs
1 cup dark brown sugar, packed
⅓ cup milk (I used 2 %)
1 ½ teaspoons vanilla extract
12 tablespoons unsalted butter, melted and slightly cooled
1 ½ teaspoons baking powder
½ teaspoon baking soda
1 teaspoon kosher salt
1 ½ cups unbleached, all-purpose flour
The Recipe
1. Make sure oven rack is the center and preheat to 350ºF. Butter the bottom and sides of a 9-inch round cake pan and line the bottom with a round of parchment paper. Set aside.
2. To make the pear base: Place the 3 ½ tablespoons softened butter in a small bowl with the sugar and salt and mash the ingredients together with a spatula or large spoon until you get a sort of paste. Then use your fingers to spread the mixture out in the prepared pan. This takes a bit of patience—it will seem like there is not enough to cover the bottom, but just keep gently pressing it into a thin, even layer and it will eventually get there. Place the sliced pears in concentric circles on top of it, filling in the center with any little bits of pears or any smaller pieces. Set aside.
3. For the cake: Into a large bowl, place the eggs, brown sugar, milk and vanilla. Whisk together. Then add the melted butter and whisk in well. In a separate bowl, using a clean whisk, mix together the flour, baking powder and soda and salt. Then whisk into the batter, whisking just until you can’t see any traces of flour. Don’t over whisk. Carefully scrape the batter over the pears in the pan, so as not to disturb them and spread the batter into an even layer.
4. Bake for 45 minutes and check to see that the cake is golden and springy to the touch and that a cake tester inserted into the center, comes out clean. The original recipe said 55 minutes but I checked at 45 and mine was totally done. Remove cake from oven and let sit on a wire rack for 30 minutes.
5. Run a knife around the edges to loosen the cake from the sides and invert onto the rack or a platter. Peel off the parchment paper. The bottom is now the top. Let the cake finish cooling completely and then cut into wedges and serve. You can store this well wrapped at room temperature for up to 3 days and longer in the fridge and you can definitely make this the day before without compromising the flavor and texture at all.
Enjoy!
Note: Recipe adapted from Mastering My Mistakes In The Kitchen by Dana Cowin. I used 2% milk instead of whole and added more vanilla extract and cut the almond extract. I also cut the glaze entirely—the cake has plenty going on without it.