Skillet Flatbreads

Happy February! So…a lot of us are going to be stuck inside due to the big storm today, and I thought we could use a little snowy day project: these soft and chewy Skillet Flatbreads! In addition to being totally delicious, they’re made with pantry staples (no need to run out to the store in bad weather) and strike just the right balance between fun and time-occupying project—I promise they won’t take you a whole day—these don’t even need to bake in the oven— and you’ll get the joy and satisfaction of fresh, homemade bread! If, on the other hand, you live someplace where it’s warm, get out and spend as much time as you can in the sunshine and save these for another day—at the very least, we snow-bound folks can live vicariously through you for a bit!!
Anyhoo, if you’ve got flour, salt, yeast, water and olive oil in the house, you’re good to go right now.
The dough gets mixed together by hand till it’s sort of shaggy, like this:

And then kneaded into a smooth ball.

Once it’s risen, you divide it into small pieces, dredge in a bit of flour, and roll out into thin rounds.

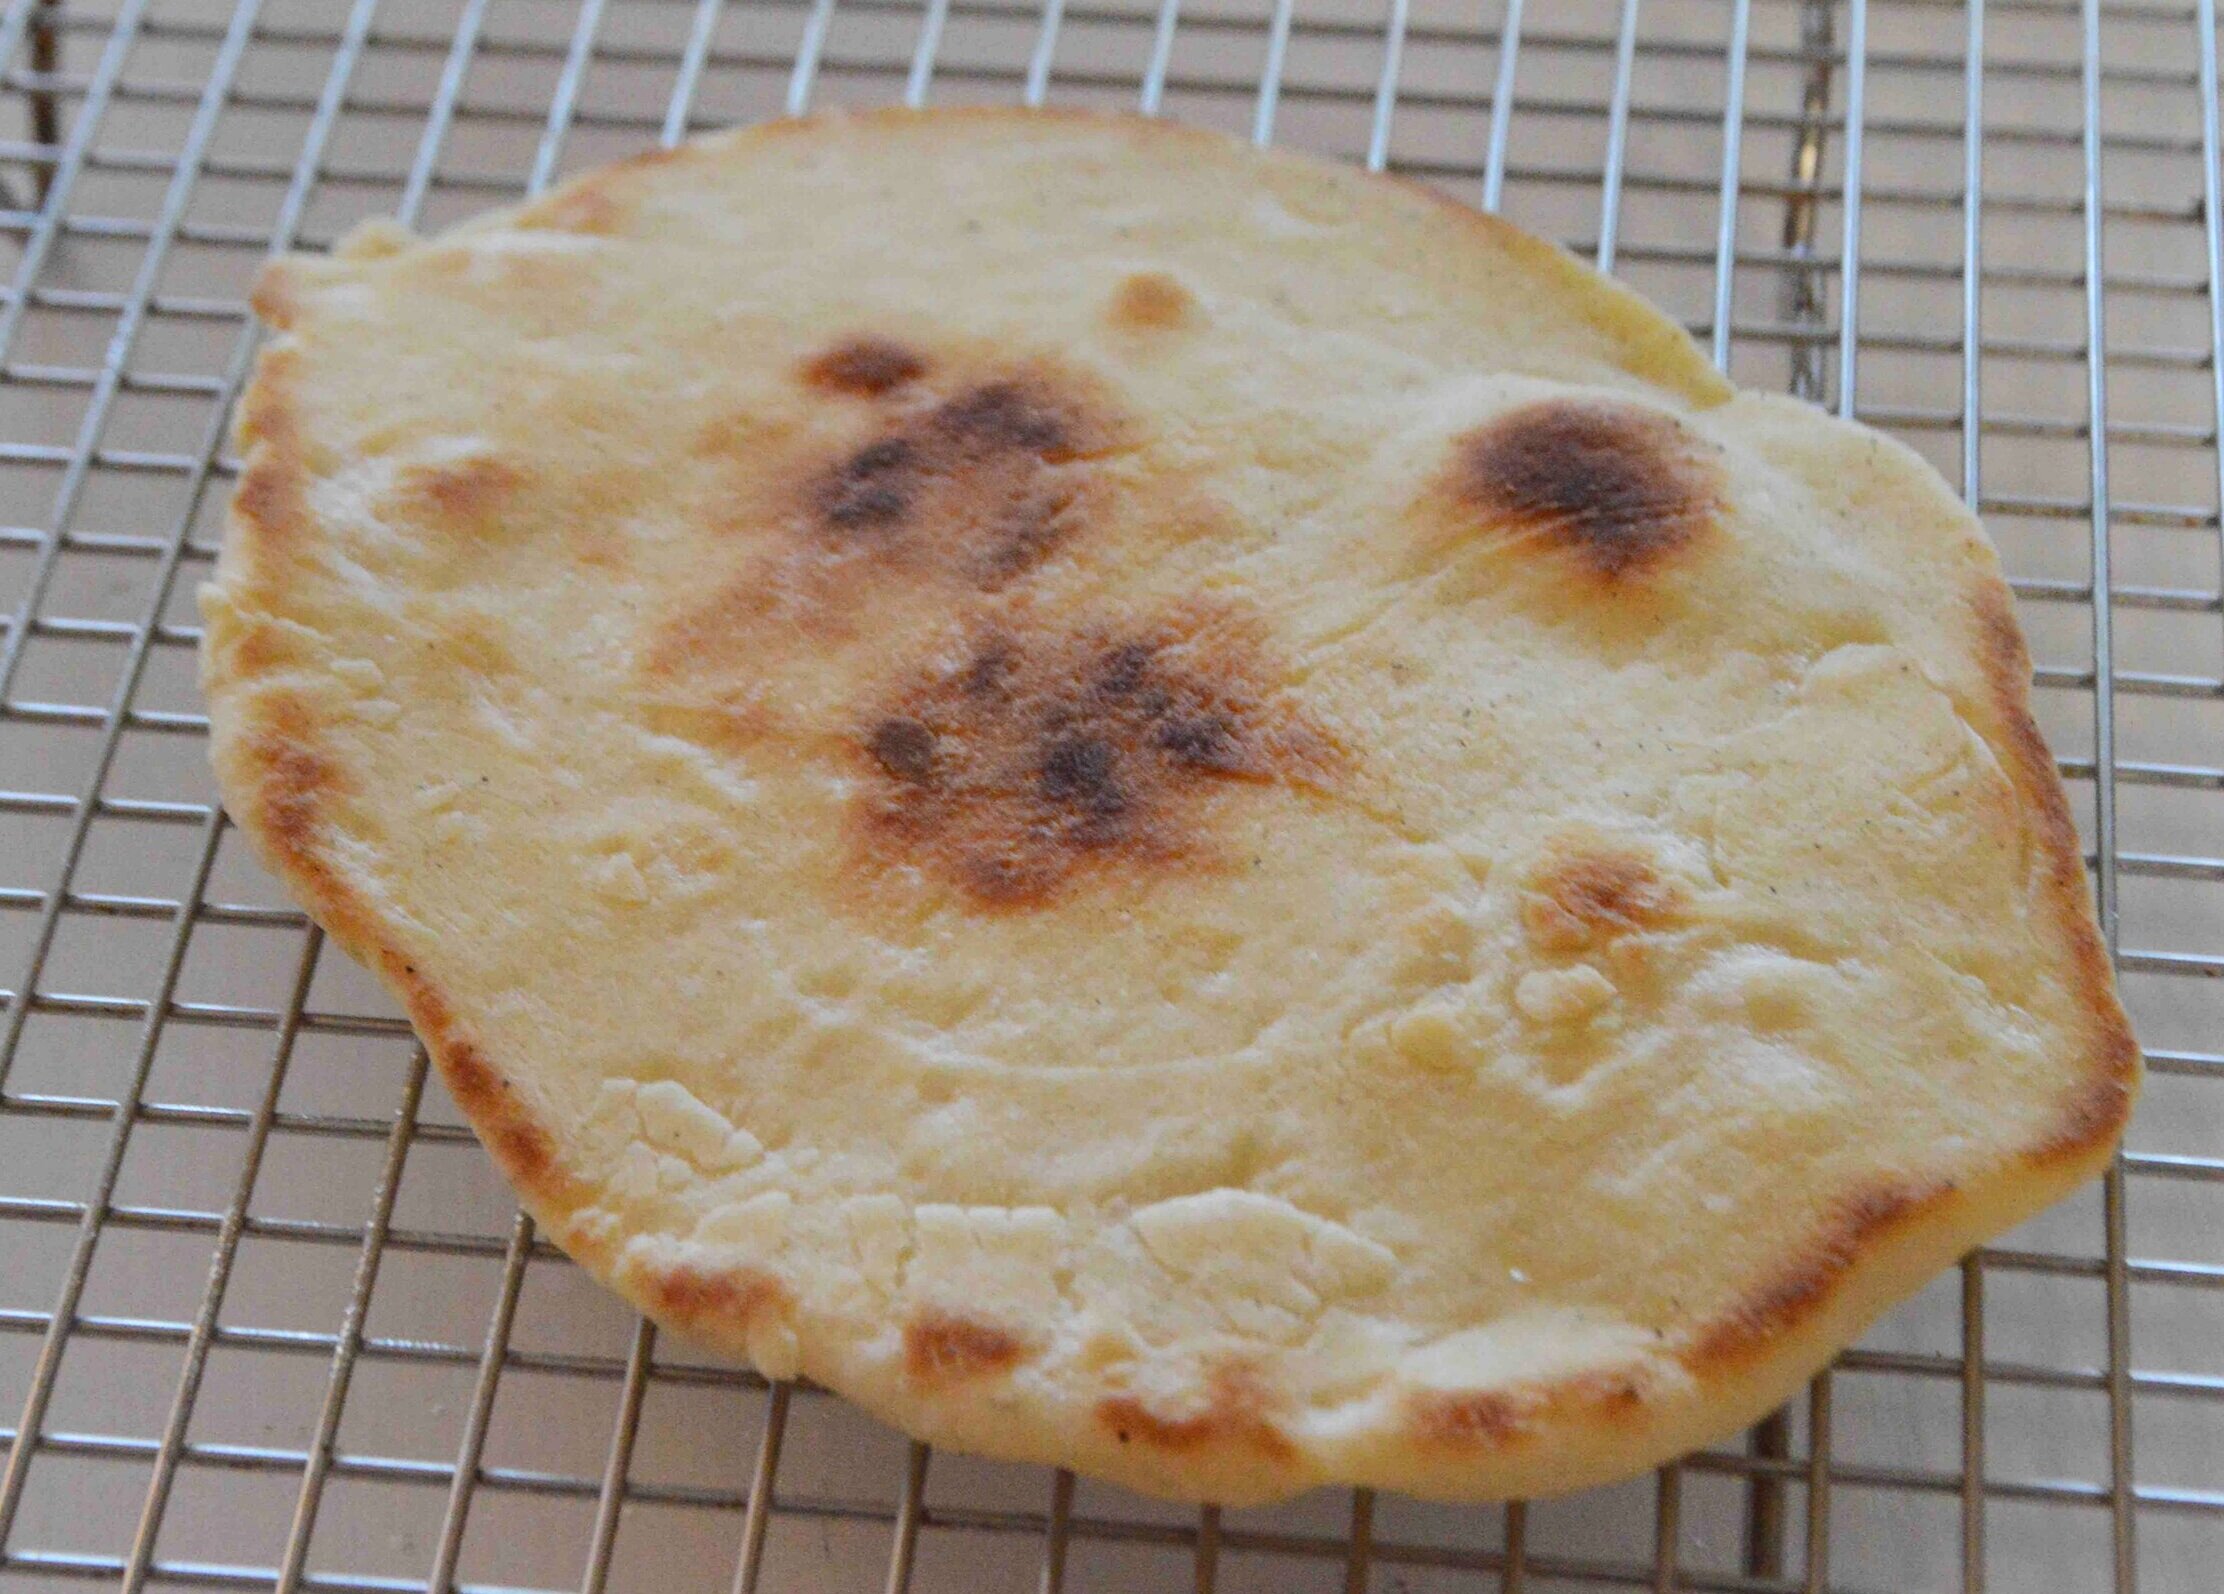
Then, it’s just a matter of frying them in a little bit of olive oil for a few minutes on each side—

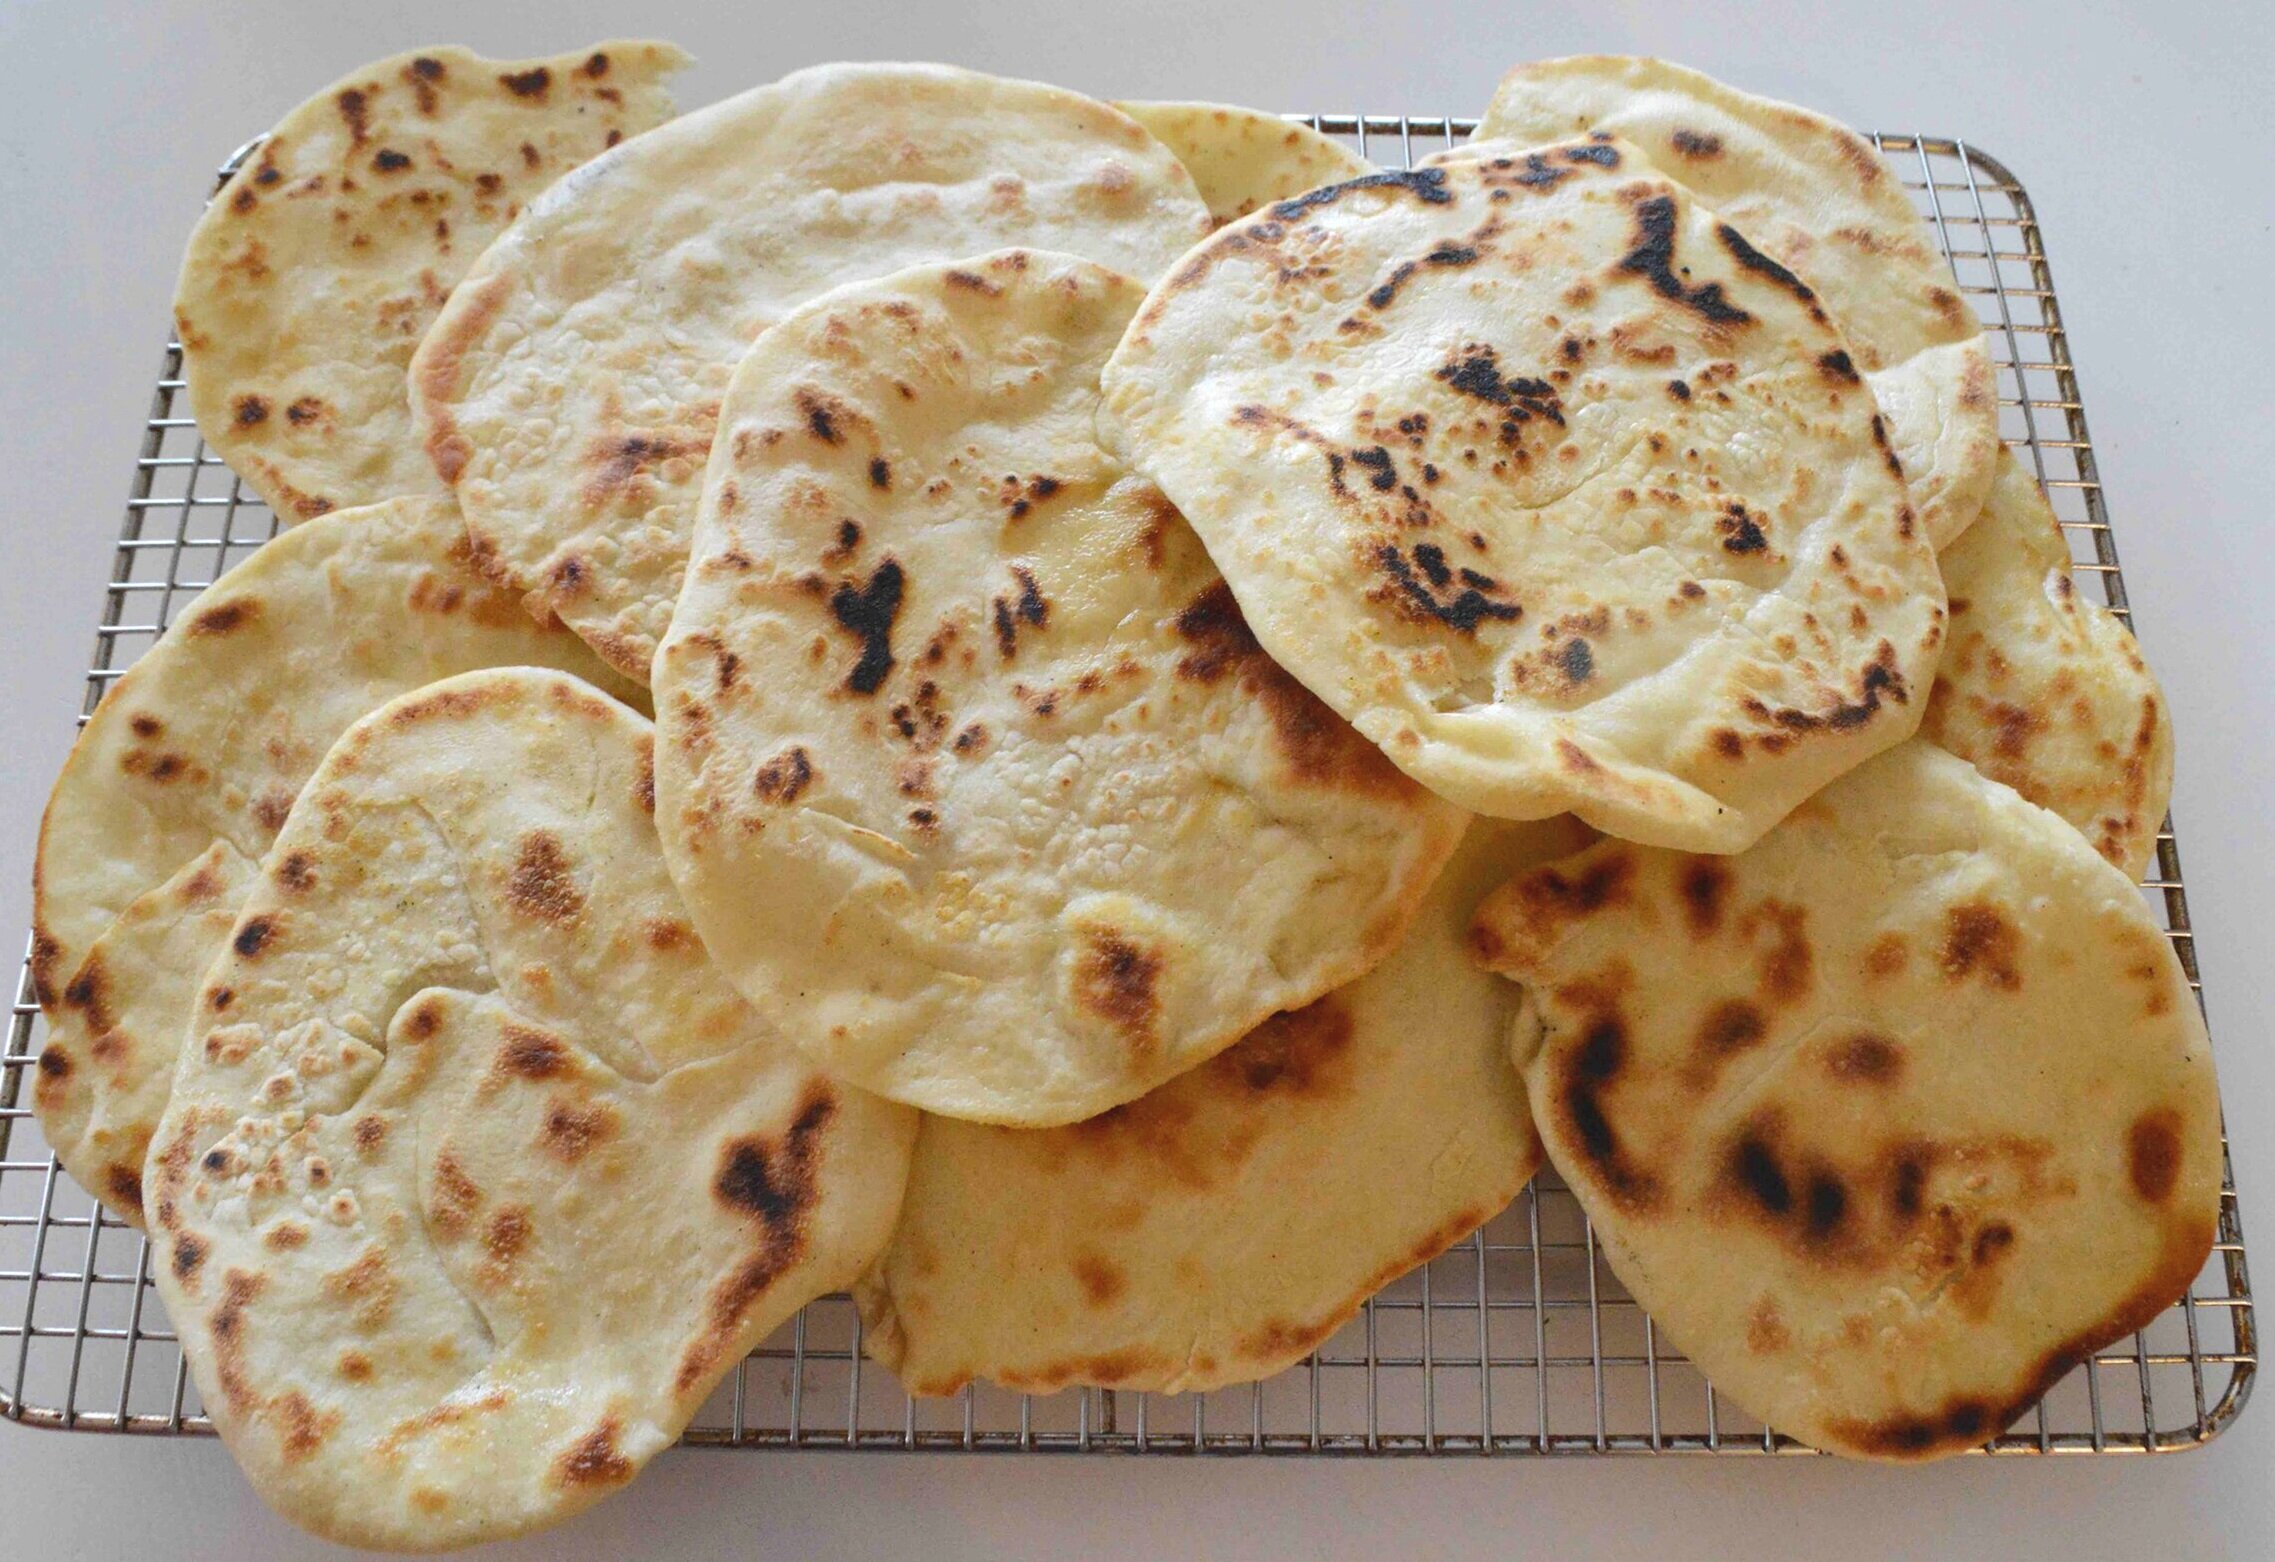
Until they puff up and get all golden brown and chewy, with some wonderful charred spots that add so much flavor.
My friends, these are seriously addictive! Wonderful on their own, warmed up for breakfast or dipped into some hummus or tzatziki or soup for lunch,—

Or as the base for the most amazing sandwiches!

No matter how you serve them, I promise they won’t last long!!

Here’s to a delicious Snow Day!!
Skillet Flatbreads
Makes about 1 dozen
Prep Time for dough: 20 minutes, plus several hours rising time and time to roll out dough into circles; Cook Time: about 5 minutes per flatbread
Ingredients
3 cups unbleached all-purpose flour, plus extra for rolling out
2 teaspoons fine sea salt
2 ¼ teaspoons active dry yeast*
1 cup warm water, between 110-120ºF, divided
3 tablespoons olive oil, divided, plus more for the skillet
The Recipe
1. Add the 3 cups flour and salt to a large mixing bowl and whisk together well.
2. Place the yeast in a small bowl. Whisk in ¼ cup warm water and then 2 tablespoons of the oil. Let the mixture rest for 10 minutes until you start to see it become foamy. Pour into the center of the bowl with the flour and salt and use a wooden spoon to mix the ingredients together until you have a shaggy dough. Add in the remaining ¾ cup warm water and mix again until the dough comes together.
3. Turn the dough out onto a floured board or surface and knead the dough with the heel of your hand, pushing it outward, folding over and repeating this process, for about 6 minutes, until the dough is smooth and not at all sticky, in a ball.
4. Add 1 tablespoon of oil to a large bowl and swirl it around to coat. Place the dough in the bowl and turn to coat it with the oil. Cover it with a clean kitchen towel and let it rise at room temperature until it has doubled in size, 1 ½-2 hours. If your room is cold, turn on the oven to 300ºF and place the bowl nearby.
5. Once the dough has risen, divide it equally into 12 pieces. Lightly flour a board and dredge each ball of dough into some flour. Use a rolling pin to roll out each ball, into a ¼-inch round and transfer to a plate.
6. Heat a large cast-iron or heavyweight skillet over medium-high heat and when hot coat the bottom with about a tablespoon of oil. Add a circle of dough, lower the heat to medium and let cook for a couple of minutes on one side, until the bottom is golden brown. You’ll see bubbles start to puff up on the top. Use tongs to turn the dough over and cook for another minute or two. Transfer to a wire rack to cool and continue to cook the rest of the rounds, adding more oil in the process as necessary.
7. Flatbreads are best on the day they’re baked but also pretty wonderful reheated in the oven. Store them in an airtight container in the fridge for a few days.
Enjoy!
Note: Recipe adapted from an old issue of Bon Appétit and cooking technique based on a method from King Arthur.
*If you only have instant yeast, add it to the flour mixture in Step 1 and simply whisk the warm water and 2 tablespoons of oil directly into the dry ingredients, skipping the 10 minute proofing process.